-
Consent notice creation
-
Compliance report
-
Preference Management Platform
-
Privacy Request
-
IAB TCF
-
Analytics
-
Integrations
-
Lexicon
-
Legal Requirements
-
Release notes
-
Privacy Center and Data Processing
-
Agnostik - Facettes
-
Use cases
-
FAQ
-
Versions & Proofs
-
Login & Security
-
Video tutorials
-
Privacy Hub widget
-
Consent Notices (old flow)
Set up Didomi CMP on Wordpress
📕 Wordpress is a CMS platform in which you can easily integrate Didomi CMP following the below steps.
No development skills are required to add the CMP to your website!
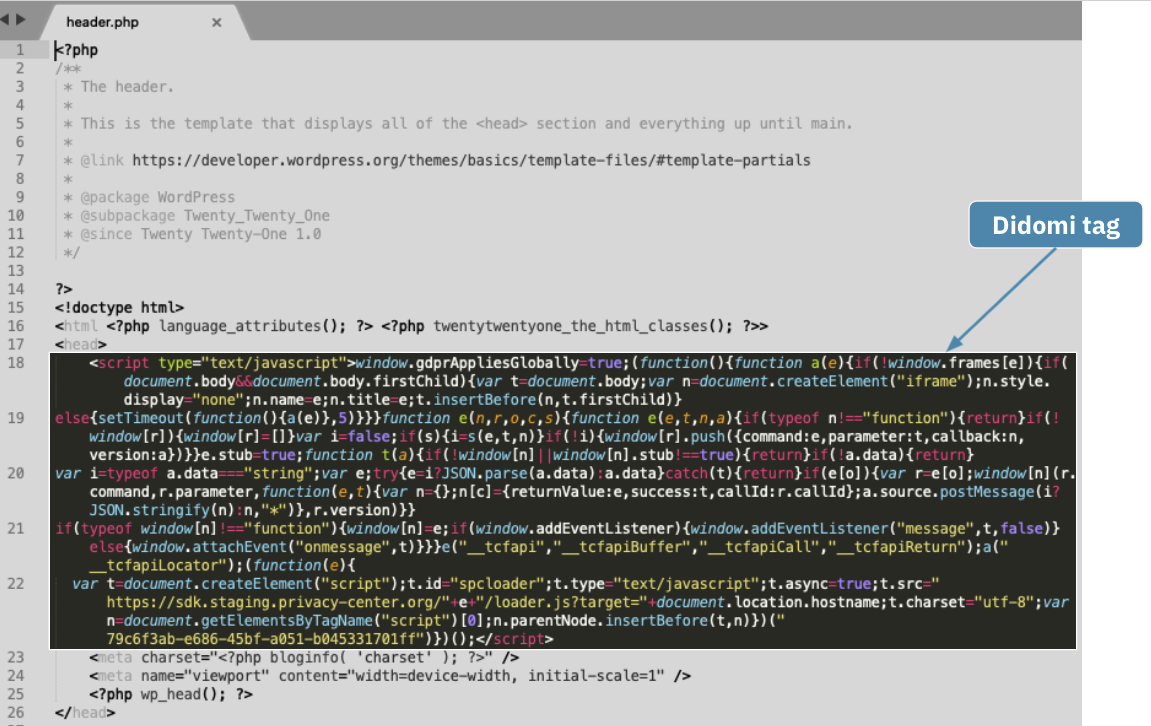
1- Add your notice tag on your Wordpress website
- Get your Didomi notice tag from Didomi console.
- From the Wordpress repository on the server, go to Wordpress > wp-content > themes > twentytwentyone > header.php.
- Paste Didomi tag right after <head>.
- Save.
⚠️ You still have to block vendors that are not part of the IAB framework through your tag manager or a Didomi custom tag to only execute after consent is collected.
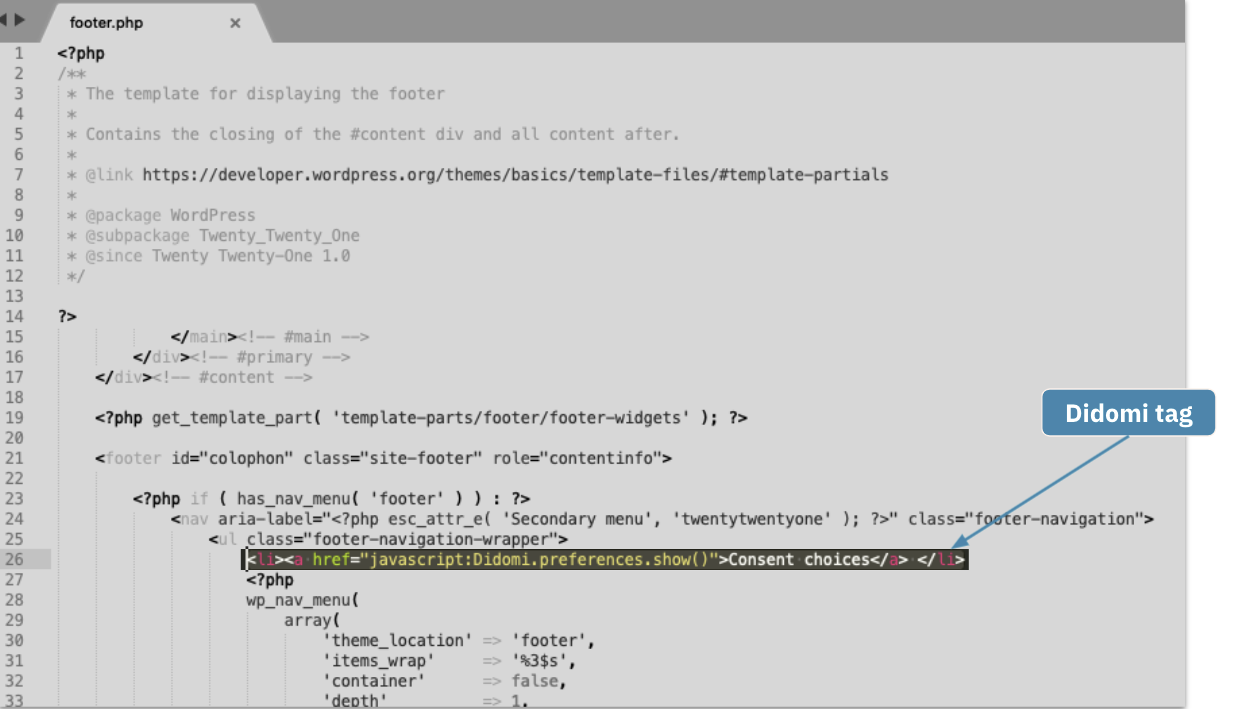
2- Add a link to open the consent preferences
- To ensure that your visitors can change their consent preferences at any point in time, add a link to re-open the Didomi consent preferences pop-in on your website. The link can be in a menu, in the footer of your website or in your privacy policy.
- Check our 📰 technical documentation to set it up.
- Here for example, the embed tag is placed in the footer (footer.php file):