Skip to content
English
  • There are no suggestions because the search field is empty.

California Invasion of Privacy Act (CIPA)

Access Type: Consent Notices - Editor

The California Invasion of Privacy Act (CIPA) is a state-specific law that requires consent from all parties to engage in wiretapping or use a trap and trace device. CIPA has been a popular tool in recent years to challenge the use of website tracking technologies such as web pixels, session replay software, and chatbots by alleging that these technologies intercept and transmit information about end-user interactions with a website to third-parties.
 
In this article, we will cover how to configure and implement a consent notice that mitigates your organization's risk under the California Invasion of Privacy Act (CIPA).
  • Configure consent notice​
  • Implementation​
  • ​Testing

Click here to learn more about about the California Invasion of Privacy Act (CIPA) in the Didomi blog.


 Configure consent notice

Didomi has identified two ways in which your organization can configure your consent notice to mitigate risk under the California Invasion of Privacy Act (CIPA) based on the way your organization is collecting consent.  

​Implied consent​
 
By navigating to the website the end-user is providing consent to the conditions conveyed in the first layer of the consent notice.
 
​Express consent​
 
The end-user has to explicitly provide consent to the purposes and vendors

Note: Please confer with your organization's legal counsel before proceeding with implied or express consent configuration. 

To start, click Consent Notices on the left-hand panel and select Create a notice on the subsequent page.
 
 
Select the platform for your consent notice and click Go to next step.
 

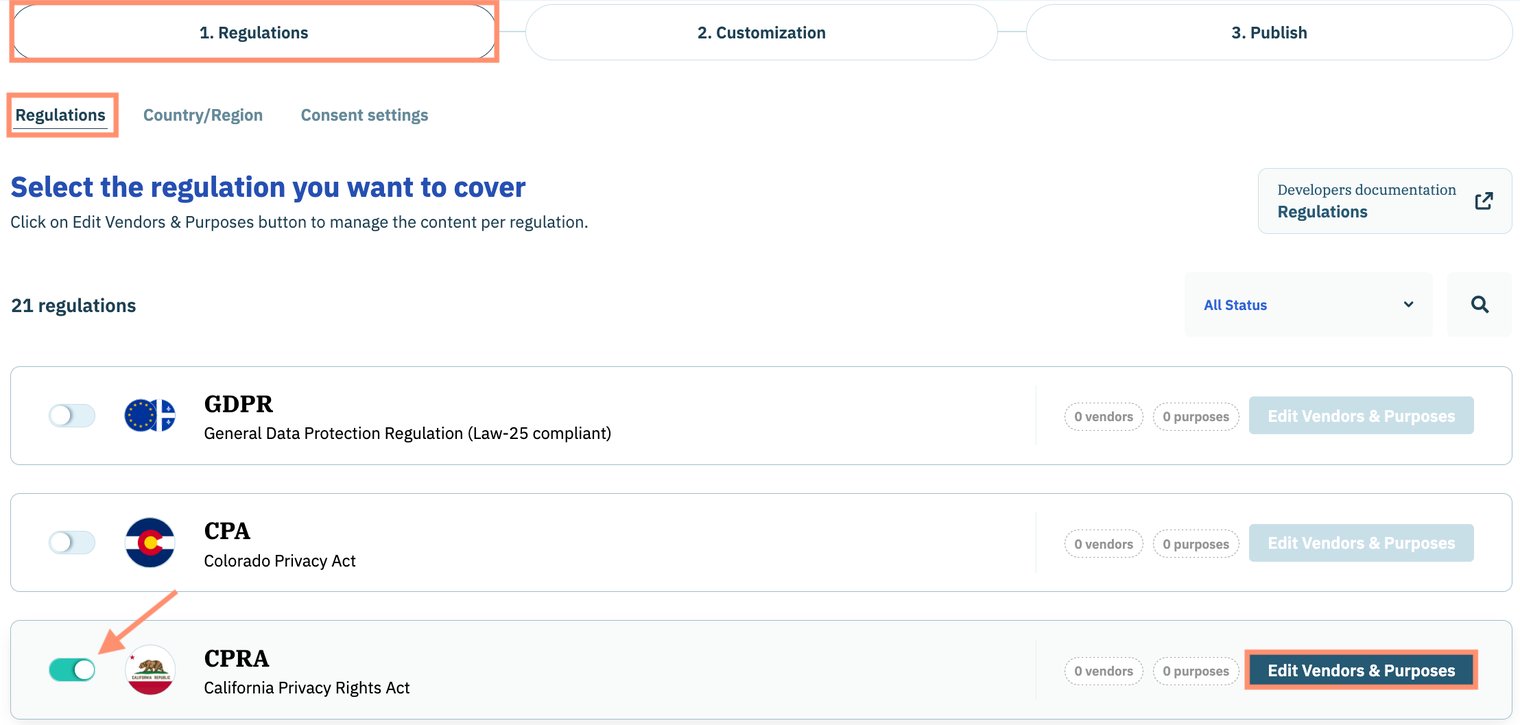
Use the following steps to select if your organization is leveraging any existing frameworks (e.g. Global Privacy Protocol (GPP)) for the consent notice. Click Generate my Consent Notice when finished. 

Navigate to the Regulations sub-tab of the Regulations tab and enable the toggle for the California Privacy Rights Act (CPRA).
 
Click Edit Vendors and Purposes inline with CPRA.
 
 
Use the Vendors section of the subsequent page to add vendors to the consent notice.
 
 
When finished, navigate to the Processing rule overrides section and click Add override
 
 
In the Add override modal:
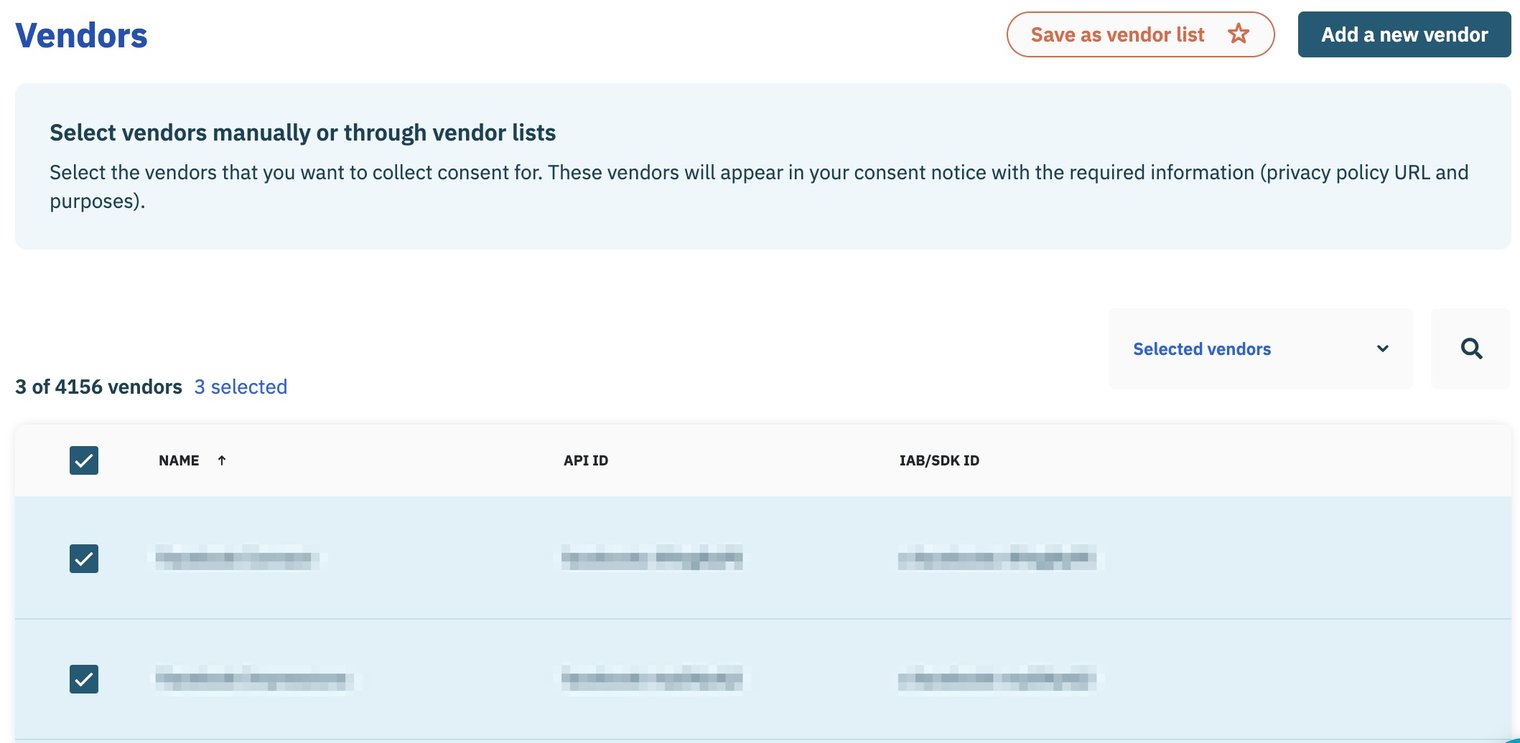
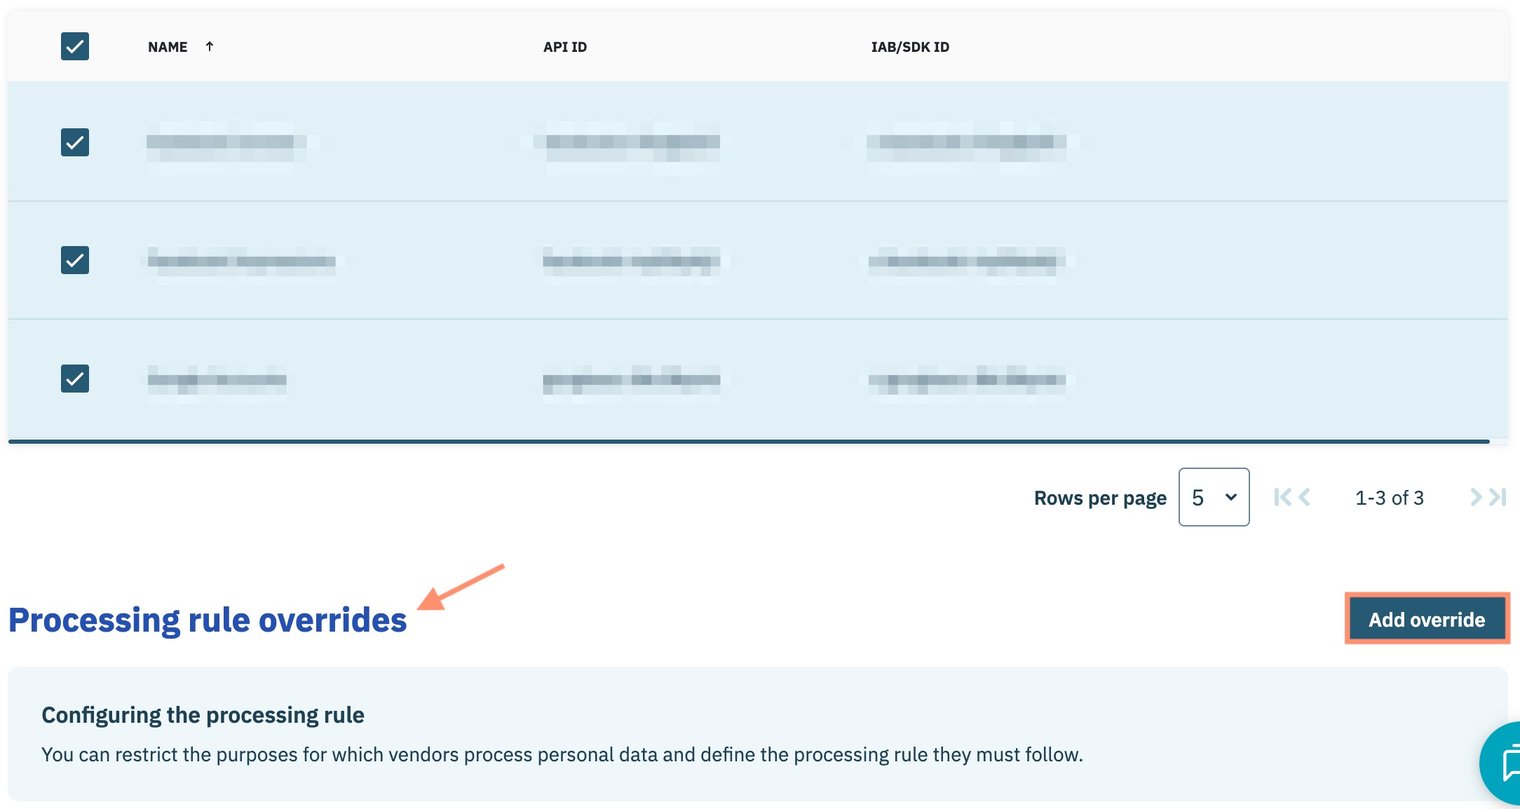
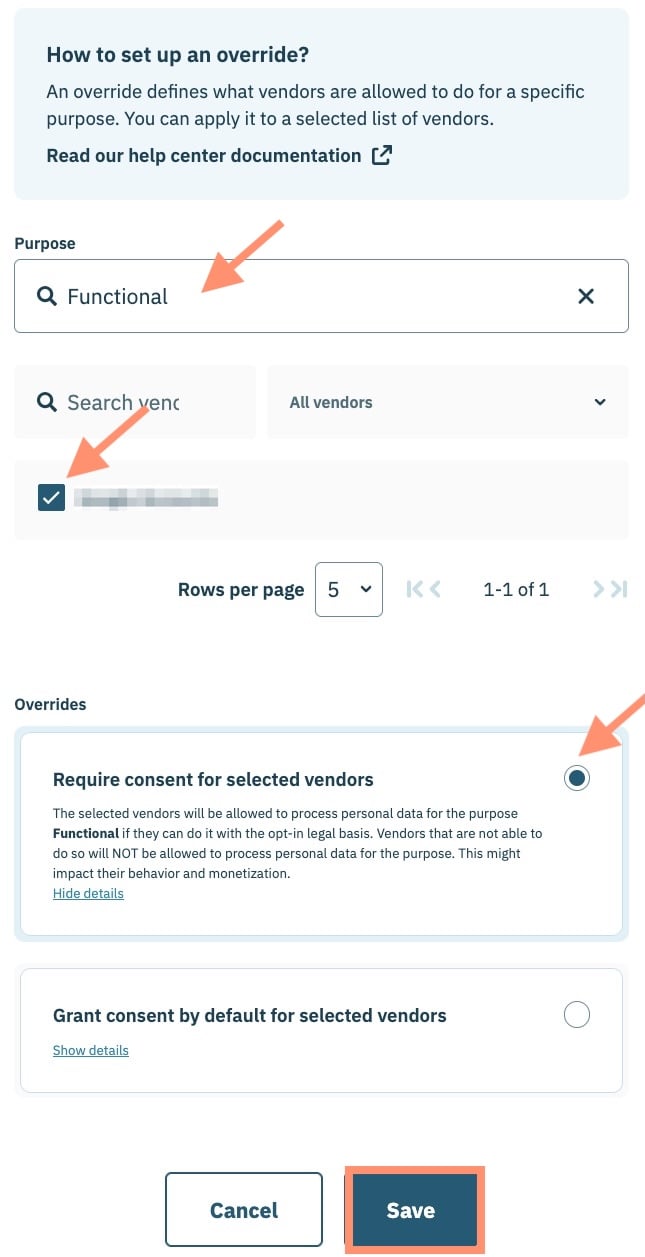
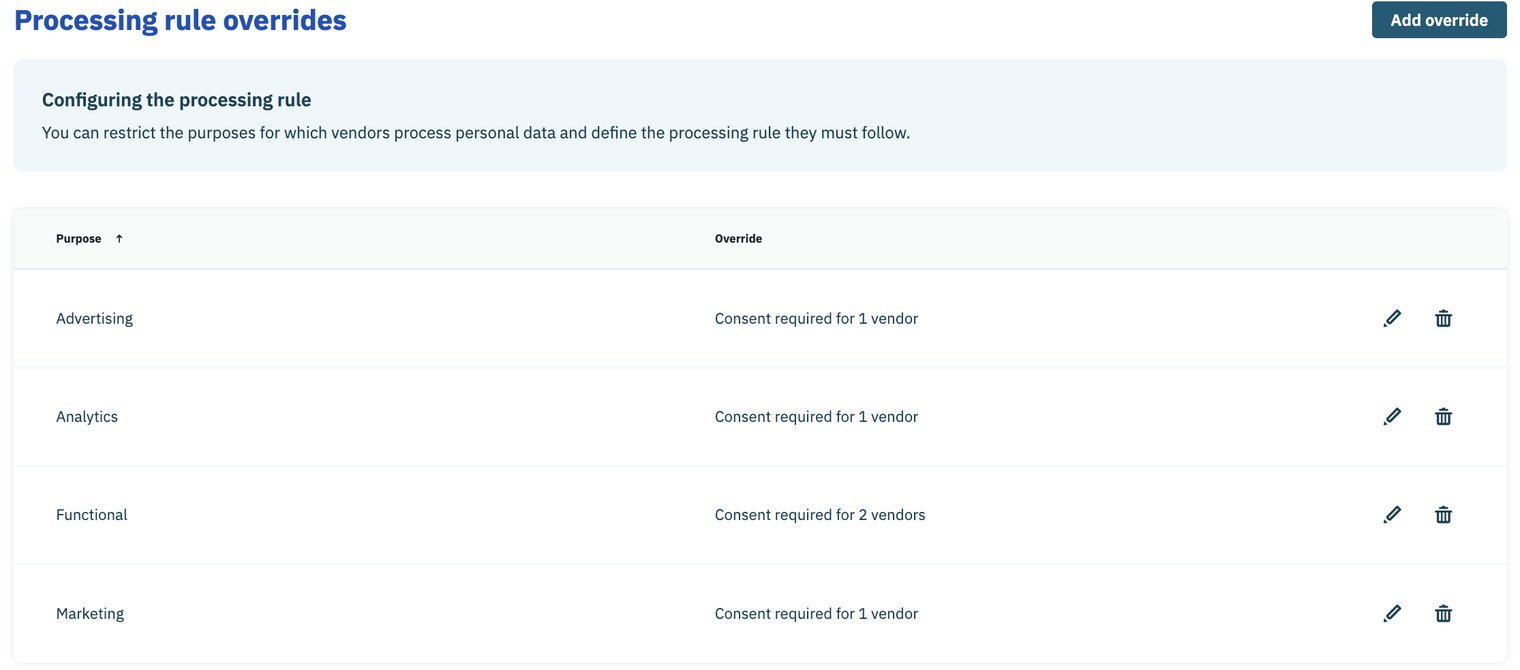
  1. Use provided drop-down menu to select a purpose
  2. Select all vendors to which the purpose applies
  3. Select option for Require consent for selected vendors
  4. Click Save when finished.

 Repeat for every purpose associated with your consent notice.


Click Save to confirm your changes to the Purposes & Vendors section of the consent notice.
 
Next, select the Customization tab to edit the end-user experience when interacting with your consent notice and click Content Editor.
 
 
Refer to the sections below for customization strategies based on whether your organization is utilizing implied consent or express consent.
 

Implied consent

The implied consent customization strategy relies on the customer navigating beyond the consent notice to the website as implicit consent to the terms and conditions outlined in the first layer of the consent notice.
 
For this strategy, your organization will want to perform the following:
  • Explicitly state in the first layer of the consent notice that navigation to the site means that the end-user accepts your organization's conditions
  • Hide any buttons/links that allow end-user to navigate to the second layer of the consent notice

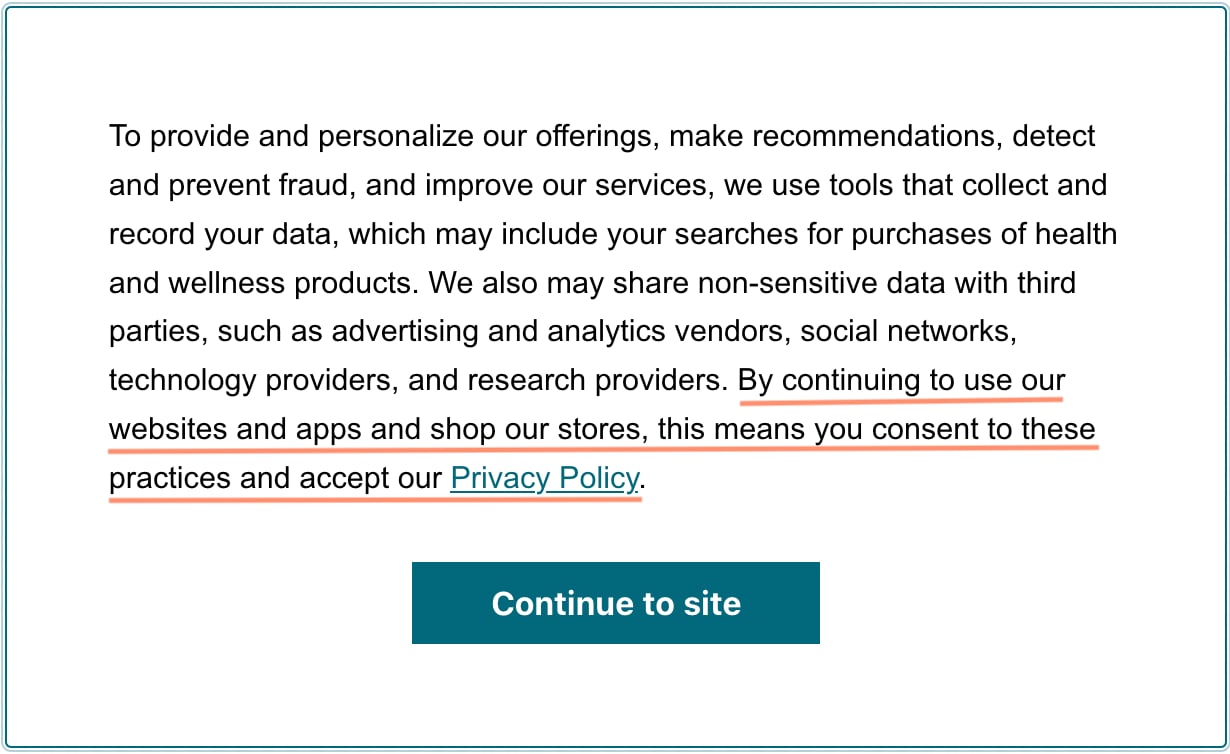
Note: In the above example, the Agree and close button has been renamed to Continue to site. This change is optional. 
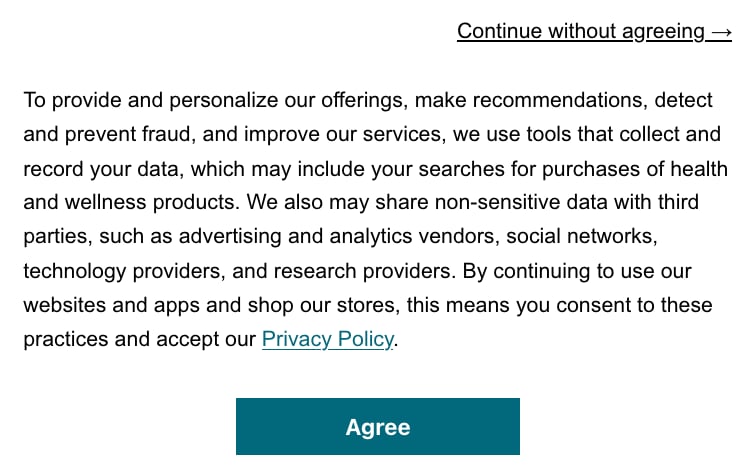
Express consent

The express consent customization strategy relies on the customer actively providing consent to the purposes associated with the consent notice. Without express consent, end-user is not collected.
 
In addition to including Agree and close button, your organization can leverage custom JSON (via Advanced settings) to further customize the consent notice to perform the following:
 
 
Customization Custom JSON
Add a Continue without agreeing link
{
  "notice": {
    "denyOptions": {
      "button": "secondary",
      "link": true
    }
  }
}
Add a Disagree and Close button
{
  "notice": {
    "content": {
      "activeElements": [
        "deny",
        "dismiss"
      ]
    }
  }
}

Please confer with your organization's legal counsel before proceeding with the customization.

Note: The above customizations will impact consent notices across all regulations configured for the consent notice. Didomi recommends that if your consent notice is designed for multiple regulations that your organization create a separate consent notice specifically for the California Invasion of Privacy Act (CIPA) use case.

Implementation

From the final page of the consent notice workflow, click Publish to enable your consent notice on websites and/or applications.
 
Follow the prompts on the page to add the configure the vendor tags and Didomi SDK onto your website and/or property.
 

Click here to learn how to conditionally load vendor tags based on the end-user's consent to a vendor and/or its purposes using custom Didomi <script> tags.


Testing

The method by which your organization tests compliance with the California Invasion of Privacy Act (CIPA) will depend on a variety of factors, including how the Didomi consent notice was implemented on your website or app. Some testing requirements that your organization should validate is that:

  1. The consent notice behaves as expected when the end-user performs specific actions
  2. No tracking technology (tags, pixel, cookies, etc...) should be fired until the end-user provides consent. 
Cookies