What is a custom scenario?
By default, Didomi ACM scans run three standard scenarios to help us gather sufficient data for generating a report.
There may be certain cases where our bot's default actions are not compatible with the way your CMP is configured. For example, our bot only searches for the "Refuse" button on the 1st layer of the consent notice. If it does not find this button, the scan is considered to have failed. In order to overcome situations like this (where the bot's expectations do not match the reality) a custom action can be configured using the API.
Another situation where a custom action comes in handy could be a specific logging in system. Both examples are covered below.
Configuring a custom action
📚 API documentation for interacting with properties (websites to be scanned) is available here.
To configure a property via the API, please have the following information handy:
| Label | Description | Possible values | Didomi example |
| name | Name of the report as it appears in the Didomi console | string | Custom action |
| website | The website to be scanned | url starting with https:// | https://www.didomi.io/ |
| schedule | Cron statement describing how often the report should run |
daily: 0 0 * * * weekly: 0 0 * * 0 monthly: 0 0 1 * * |
0 0 1 * * |
| url | Same as website | url starting with https:// | https://www.didomi.io/ |
| pages | Number of pages that to be scanned | int <= 20 | 10 |
| country | Country code from which our bot will access the url |
France: fr, Spain: es, United States: us, Canada: ca, Belgium: be, Germany: de, Great Britain: gb |
fr |
| actions -> actions | Array of actions that will be executed in order |
{
{
{
|
{
{
|
| organisation_id | Organisation id of the organisation where the property will be added | string | demo_org_id |
Example 1: Changing interaction with the notice
Obtaining the selector
In our example we are trying to get the bot to click on the "Disagree to all" button present on the second layer of the Didomi consent notice. The following steps show how to obtain the CSS selector for doing this:
- Step 1: navigate to the webpage you would like to scan (in our example, didomi.io).
- Step 2: right click on the element you would like our bot to click on. Select "Inspect".
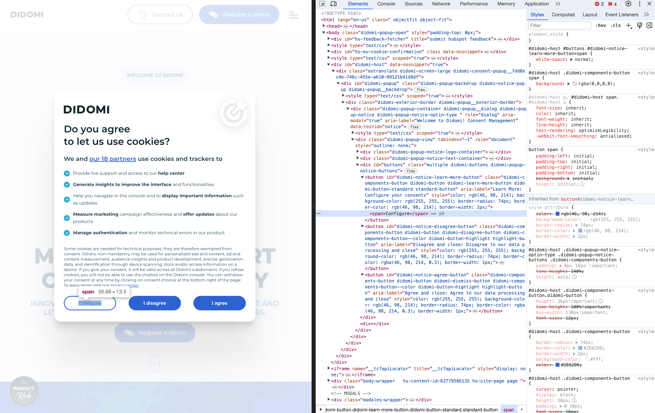
- Right click on the element <button> and select "Copy" then "Copy selector".
- Save this selector (in our case "#didomi-notice-learn-more-button" ) and continue with the steps to obtain the next element to click on. Click on "Configure" in the notice.
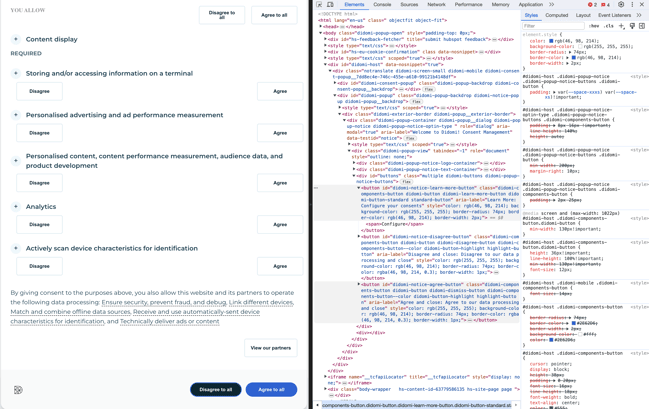
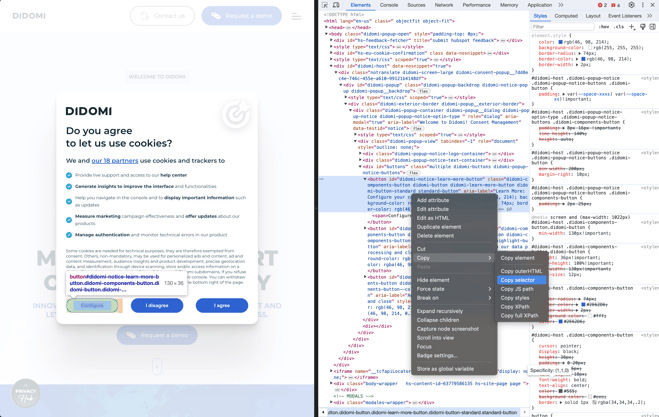
- Right click on "Disagree to all" and select "Inspect".
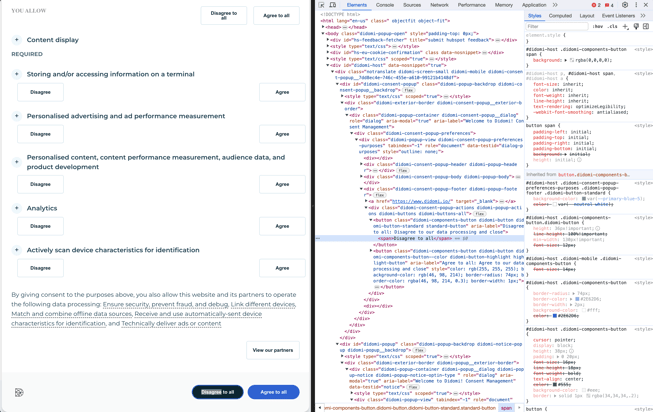
- Right click on the element <button> and select "Copy" then "Copy selector".

- Save this selector (in our case "#didomi-consent-popup > div > div > div > div > div.didomi-consent-popup-footer.didomi-popup-footer > div > button.didomi-components-button.didomi-button.didomi-button-standard.standard-button"). You can now proceed to customise the API call (steps below).
Creating the API request body
The typical API request has the following format:
{
"name": "Custom action",
"website": "https://www.didomi.io/",
"scraper": {
"schedule": "0 0 1 * *",
"url": "https://www.didomi.io/",
"pages": 10,
"country": "fr",
"enabled": true,
"actions": [
{
"page": "first",
"actions": [
{
"type": "clickOnElement",
"params":
 {
  "selector": "#didomi-notice-learn-more-button"
 }
},
{
"type": "clickOnElement",
"params":
 {
  "selector": "#didomi-consent-popup > div > div > div > div > div.didomi-consent-popup-footer.didomi-popup-footer > div > button.didomi-components-button.didomi-button.didomi-button-standard.standard-button"
 }
}
]
}
],
"scenarios":["NO_USER_CHOICE"]
},
"organization_id": "demo_org_id"
}
The elements in bold need to be present inside the JSON for the custom scenario to work. All the other elements should be filled in based on the information from the previous steps.
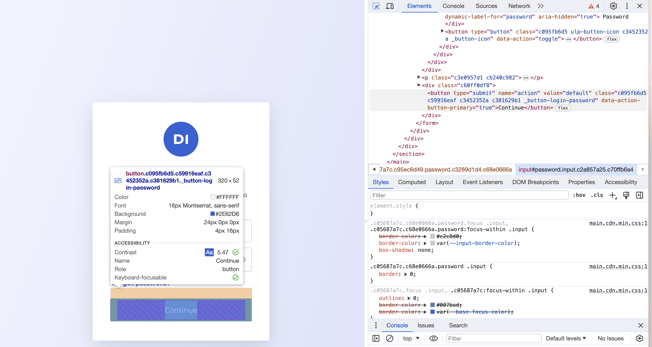
Example 2: Performing a custom logged in scenario
Obtaining the css selector
In this example we will try to perform a log in on a website where the implementation is in 2 steps, first you fill the username and submit and then the password and submit again.
Make sure that the login page and the page you would like to scan are on the same domain. If they are not the scan will fail because this will be considered as a redirect.
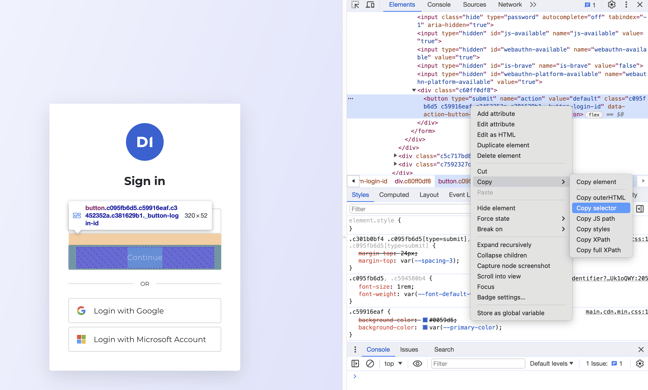
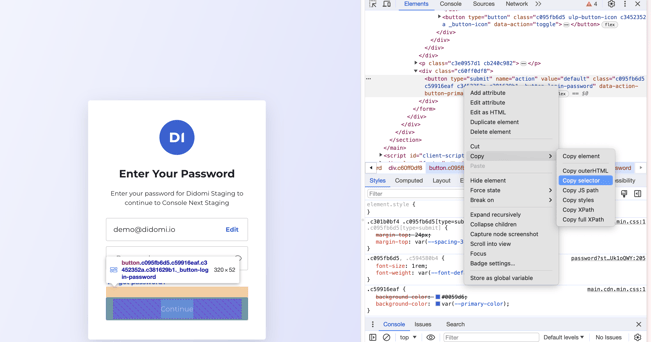
- Step 1: navigate to the webpage you would like to scan and login (in our example, console.didomi.io).
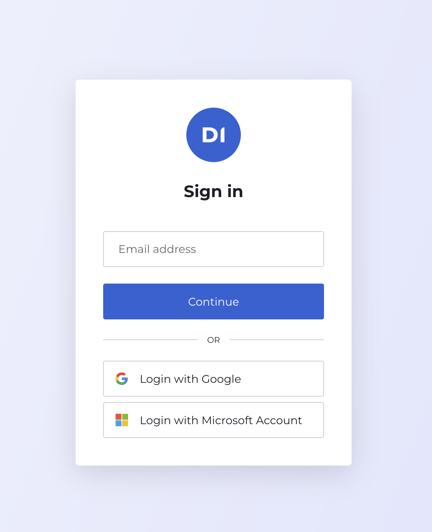
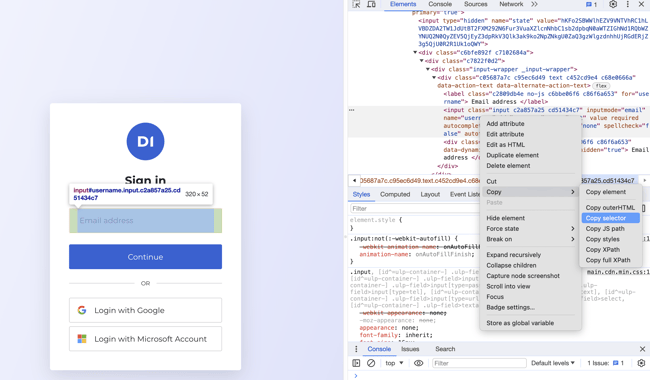
- Step 2: right click on the element you would like our bot to insert the text. Select "Inspect".
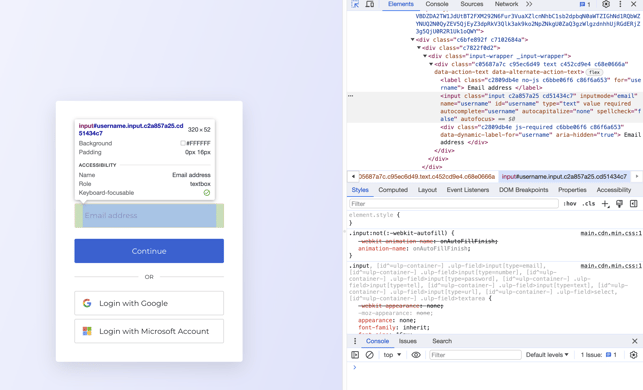
- Right click on the element <input> and select "Copy" then "Copy selector".
- Step 4: right click on the element you would like our bot to click on (submit button). Select "Inspect".
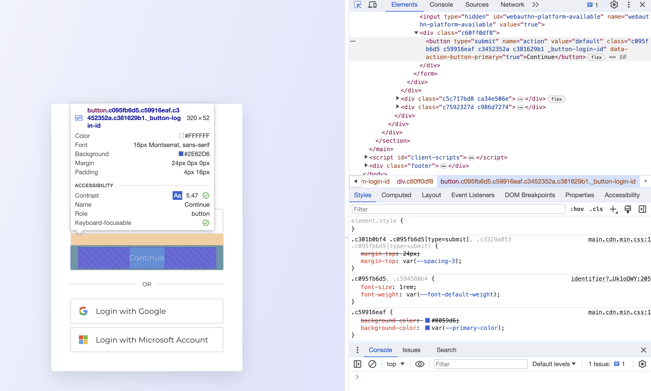
- Right click on the element <button> and select "Copy" then "Copy selector".
- Proceed the same when prompted for the password. Collect the imput selector for the password field.
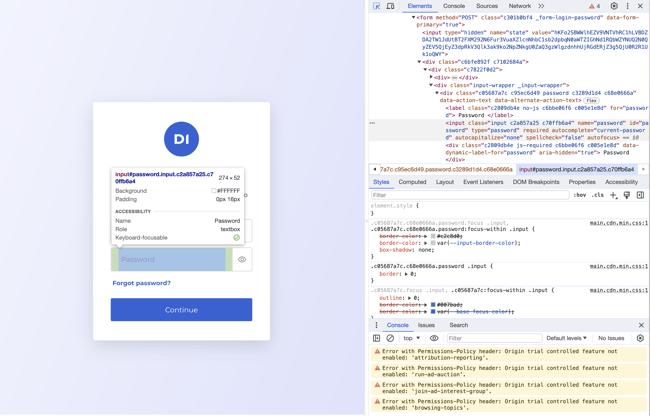
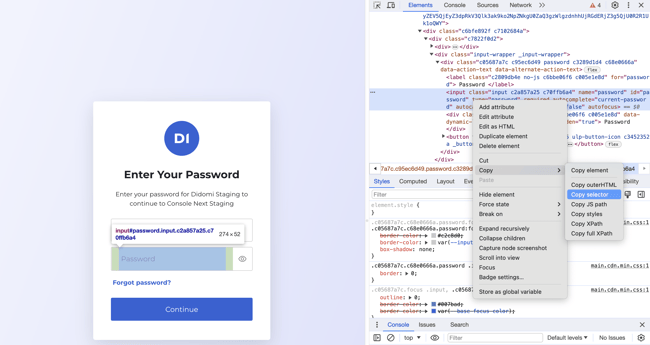
- Collect the css selector for the submit (continue) button.
- Now that we have all the selectors we can proceed with creating the API Request body.
Creating the API Request body
The typical API request has the following format:
{
    "name": "Custom action - login",
    "website": "https://console.didomi.io/",
    "scraper": {
        "schedule": "0 0 1 * *",
        "url": "https://console.didomi.io/",
        "pages": 10,
        "country": "fr",
        "enabled": true,
        "actions": [
            {
                "page": "first",
                "actions": [
                    {
                        "type": "type",
                        "params": {
                            "text":"<username>",
                            "selector": "#username"
                        }
                    },
                    {
                        "type": "clickOnElement",
                        "params": {
                            "selector": "#submit-button"
                        }
                    },
                    {
                        "type": "type",
                        "params": {
                            "text":"<password>",
                            "selector": "#Password"
                        }
                    },
                    {
                        "type": "clickOnElement",
                        "params": {
                            "selector": "#submit-button"
                        }
                    }
                ]
            }
        ],
        "scenarios":["NO_USER_CHOICE","CONSENT_TO_ALL","REFUSE_TO_ALL"]
    },
    "organization_id": "demo_org_id"
}
The elements in bold are all the steps required for the login to be performed. These actions will be done after the interaction of the bot with the notice. In case the notice is displayed after the login is performed we recommend you continue to add as custom scenario the interaction with the notice (see example 1).
Sending the request
Now that the request body has successfully been created, we need to send it to the POST /properties endpoint. Before doing this, we advise you to read the documentation presented here.
❗After adding a property using the API it might take a few hours for the scanning process to be triggered. If your report still has no data after 24 hours please contact your Didomi Account Manager.