Didomi allows you to push and pull data to/from Hubspot while collecting user preferences through the Didomi Preference Management Platform.
Enable Didomi-Hubspot integration
You can configure your Didomi-Hubspot integration directly on the Didomi Console by navigating to the Marketplace module from the left menu.
Settings
- Click on the Installation link
- Select the Hubspot account you'd like to link with Didomi. This will grant access to Didomi to update your contacts as well as react to contact updates (only in the case where the Bidirectional flow is enabled).
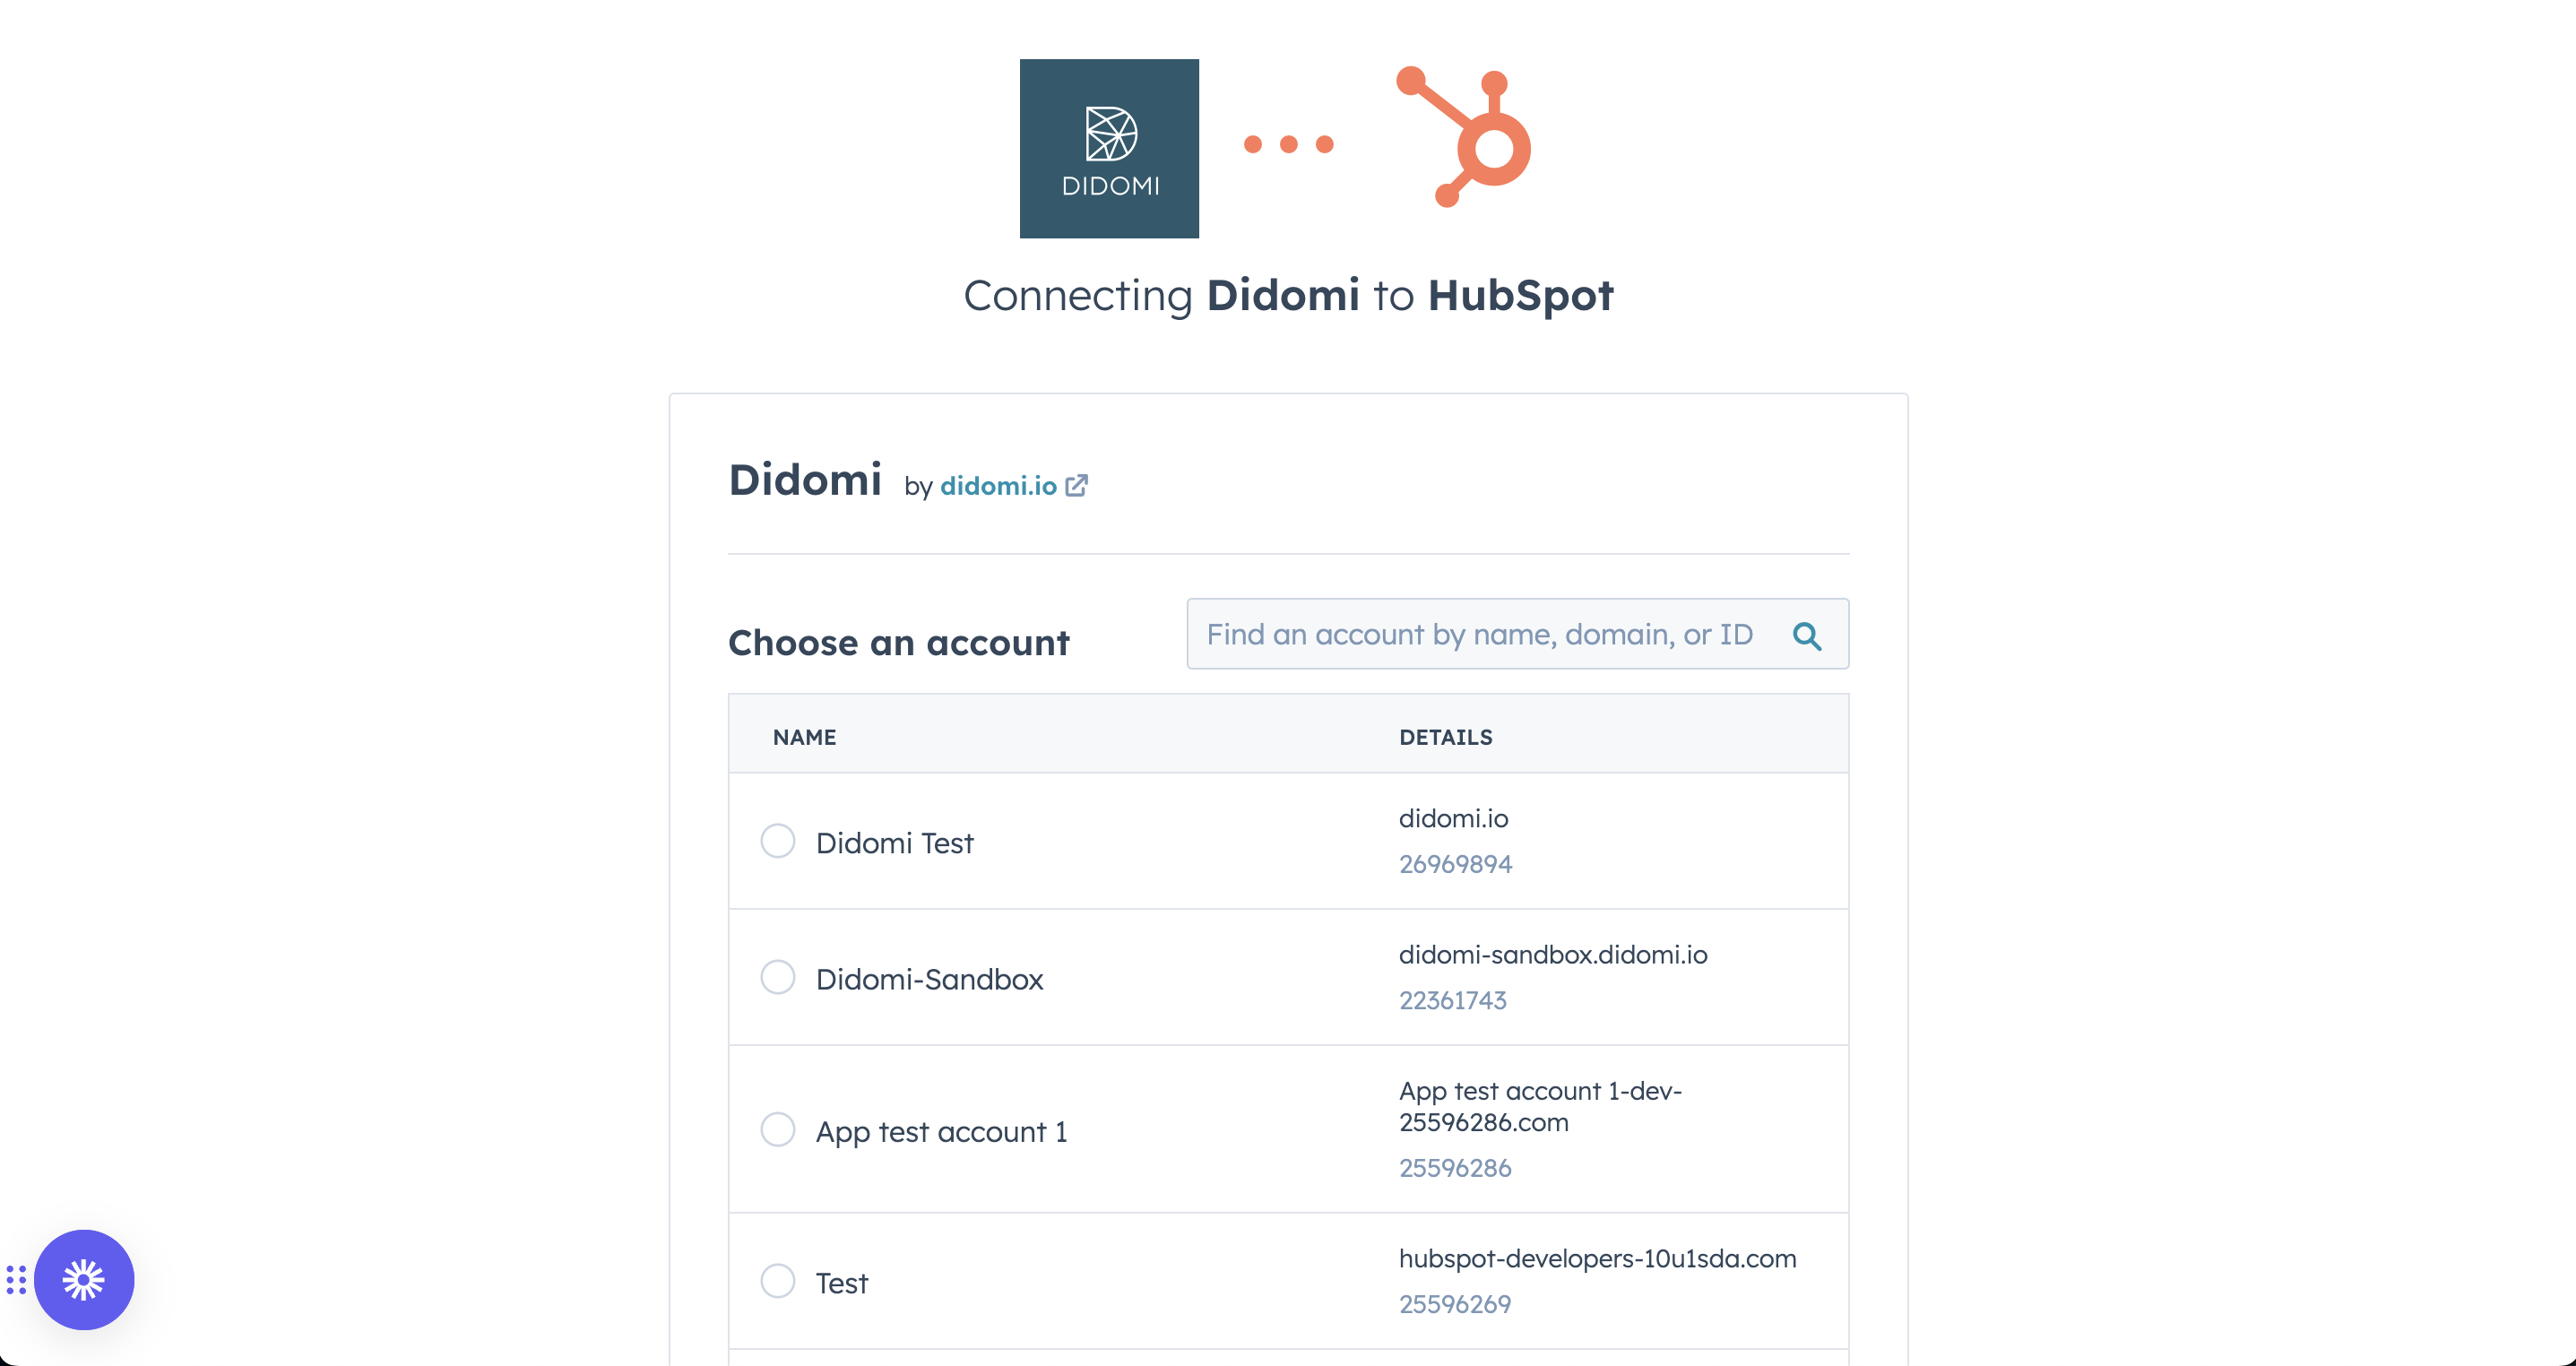
- Click on "Save".
- You are now redirected to https://didomi.io. The redirected link will contain a code parameter. This is the authorization_code to provide under the Settings step.
⚠️ The generated code must be provided within one hour, otherwise it will expire and be rejected.
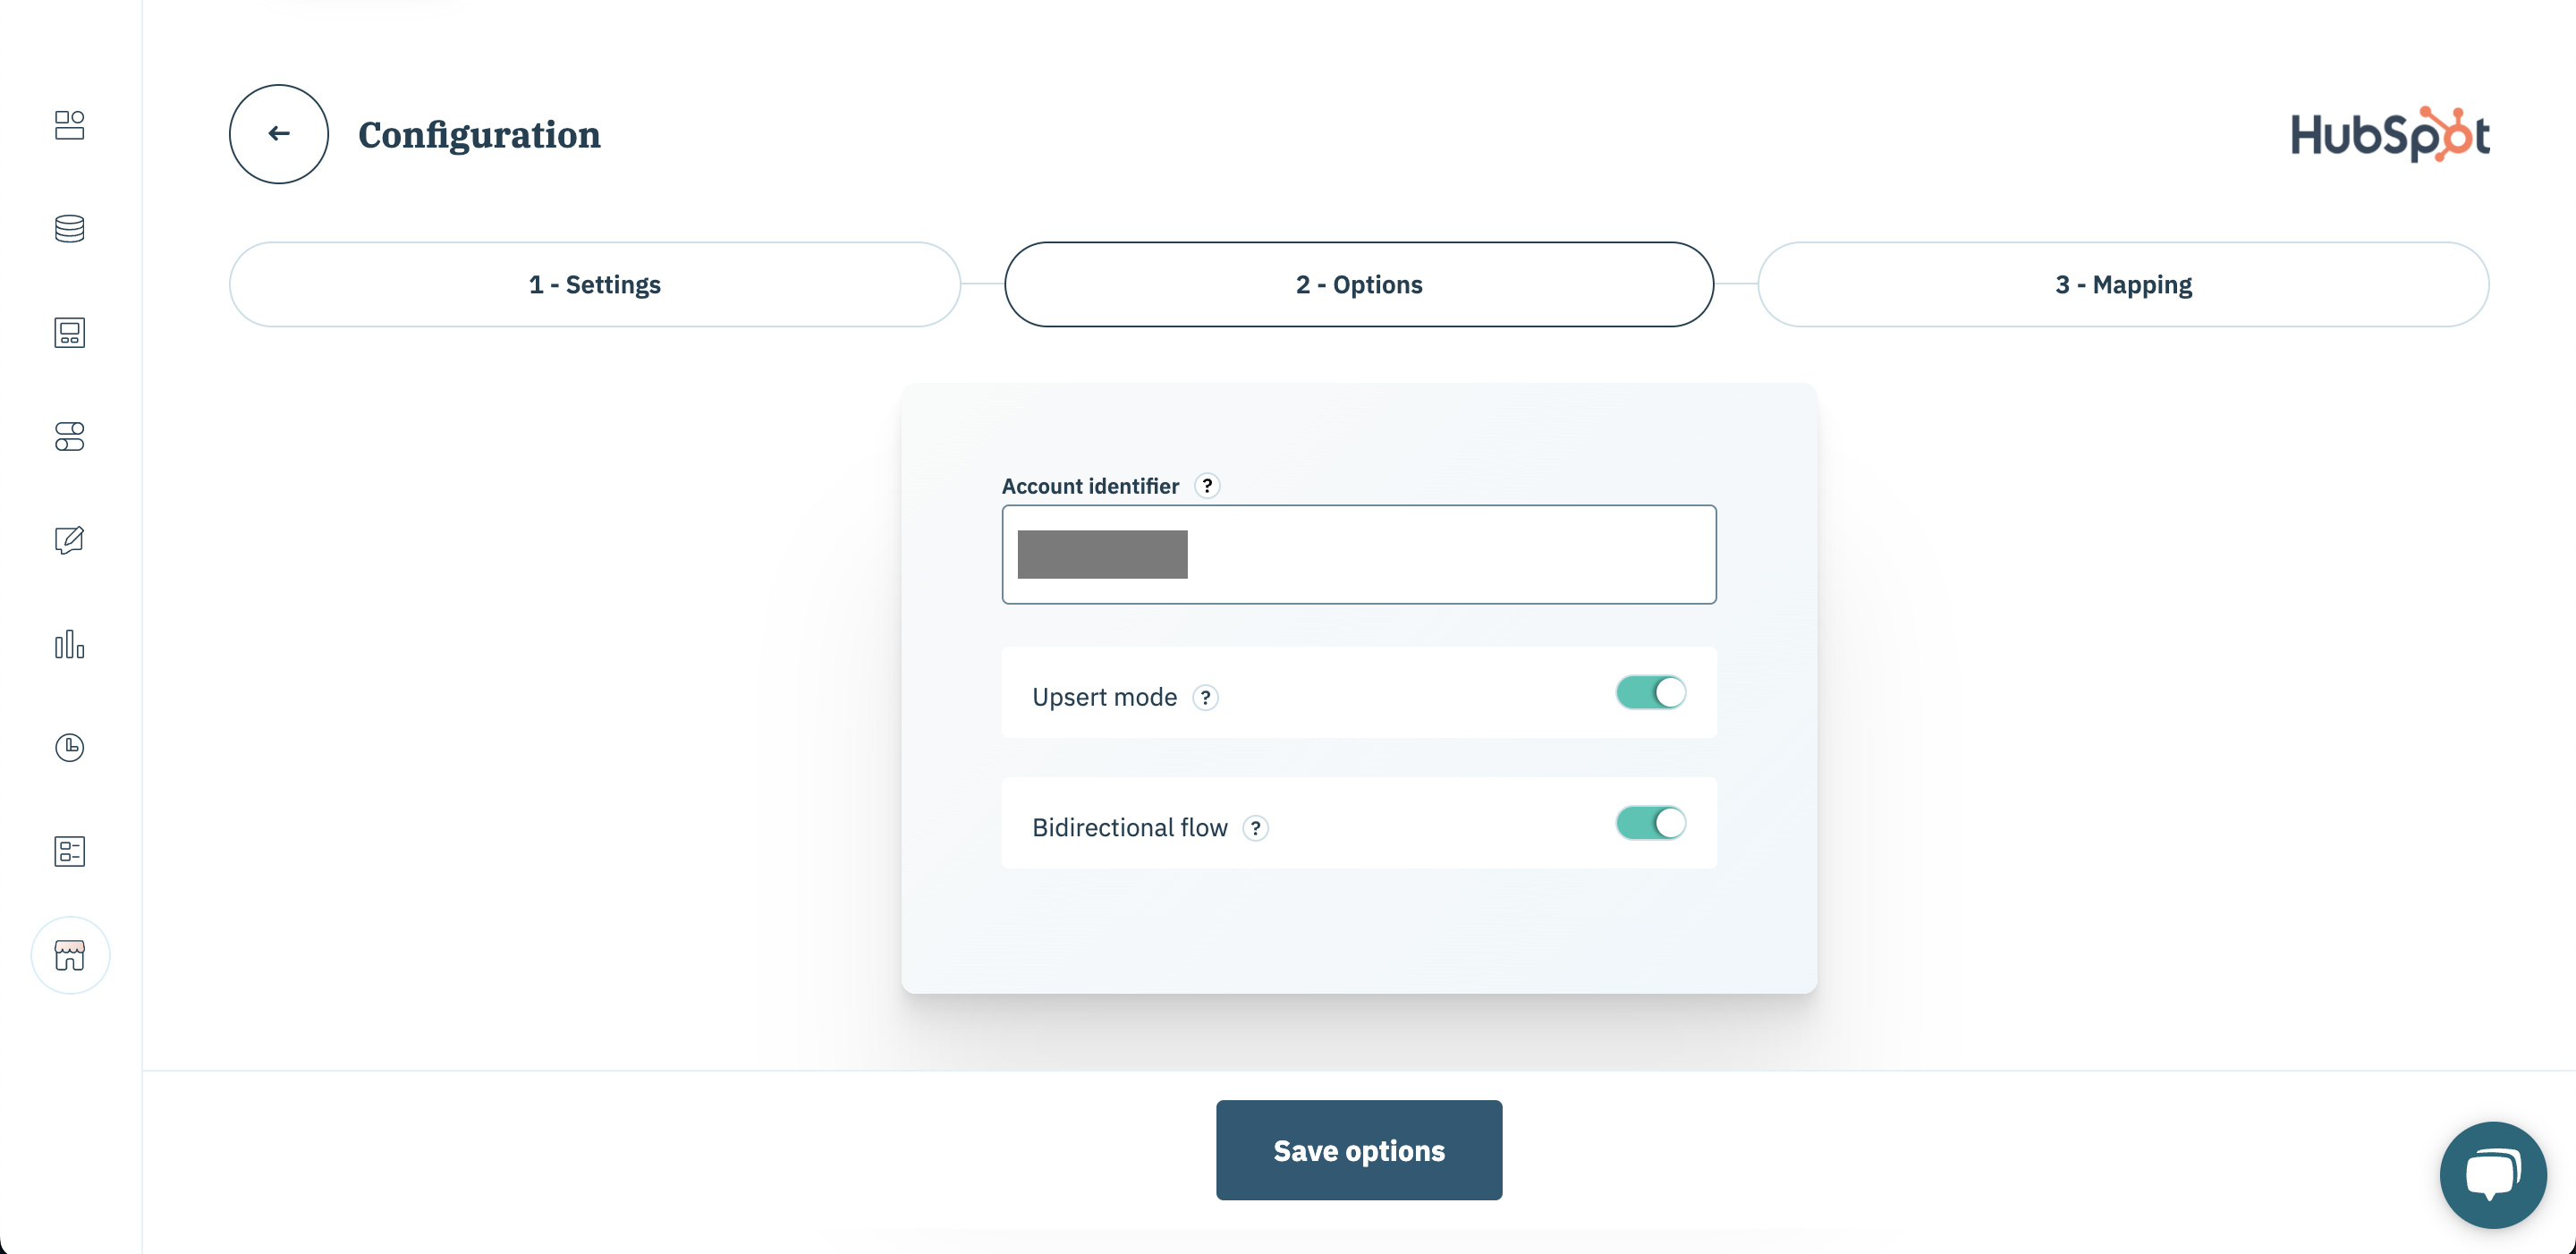
Options
- Upsert mode: by enabling this option, you authorize Didomi to create new contacts while pushing user preferences to Hubspot (contact creation occurs when there is no other contact in Hubspot matching the email address used to collect the user preferences).
- Bidirectional flow:
- By enabling this option, and based on the workflow configuration carried out in Hubspot, your Didomi user preferences will be updated each time the Hubspot contact is updated through another channel that is not Didomi.
- You will be required to add your Hubspot account identifier when you enable the Bidirectional flow (cf. screenshot below). You can find your Hubspot account identifier in the path of the URL used to access your Hubspot account.
Mapping
- For each purpose/preference/preference value, choose the corresponding Hubspot contact property. Select the Hubspot contact properties from the dropdown by name.
Certain rules must be followed when it comes to mapping Didomi properties with Hubspot properties:
| PMP attribute type | Hubspot type - possible mapping |
|---|---|
| Purpose (boolean) |
|
| Preference (string) |
|
| Value (boolean) |
|
Additional steps for bidirectional flow
During Bidirectional flow user preferences are synchronised from Hubspot to Didomi. Changes made on Hubspot contacts can be reflected on Didomi users via the workflow setup below.
After enabling the Bidirectional flow option as described above, you will need to make a few more changes in your Hubspot instance in order to fully activate data streaming from Hubspot to Didomi.
- Navigate to your Hubspot account (the one previously configured here).
- Go to Workflows.
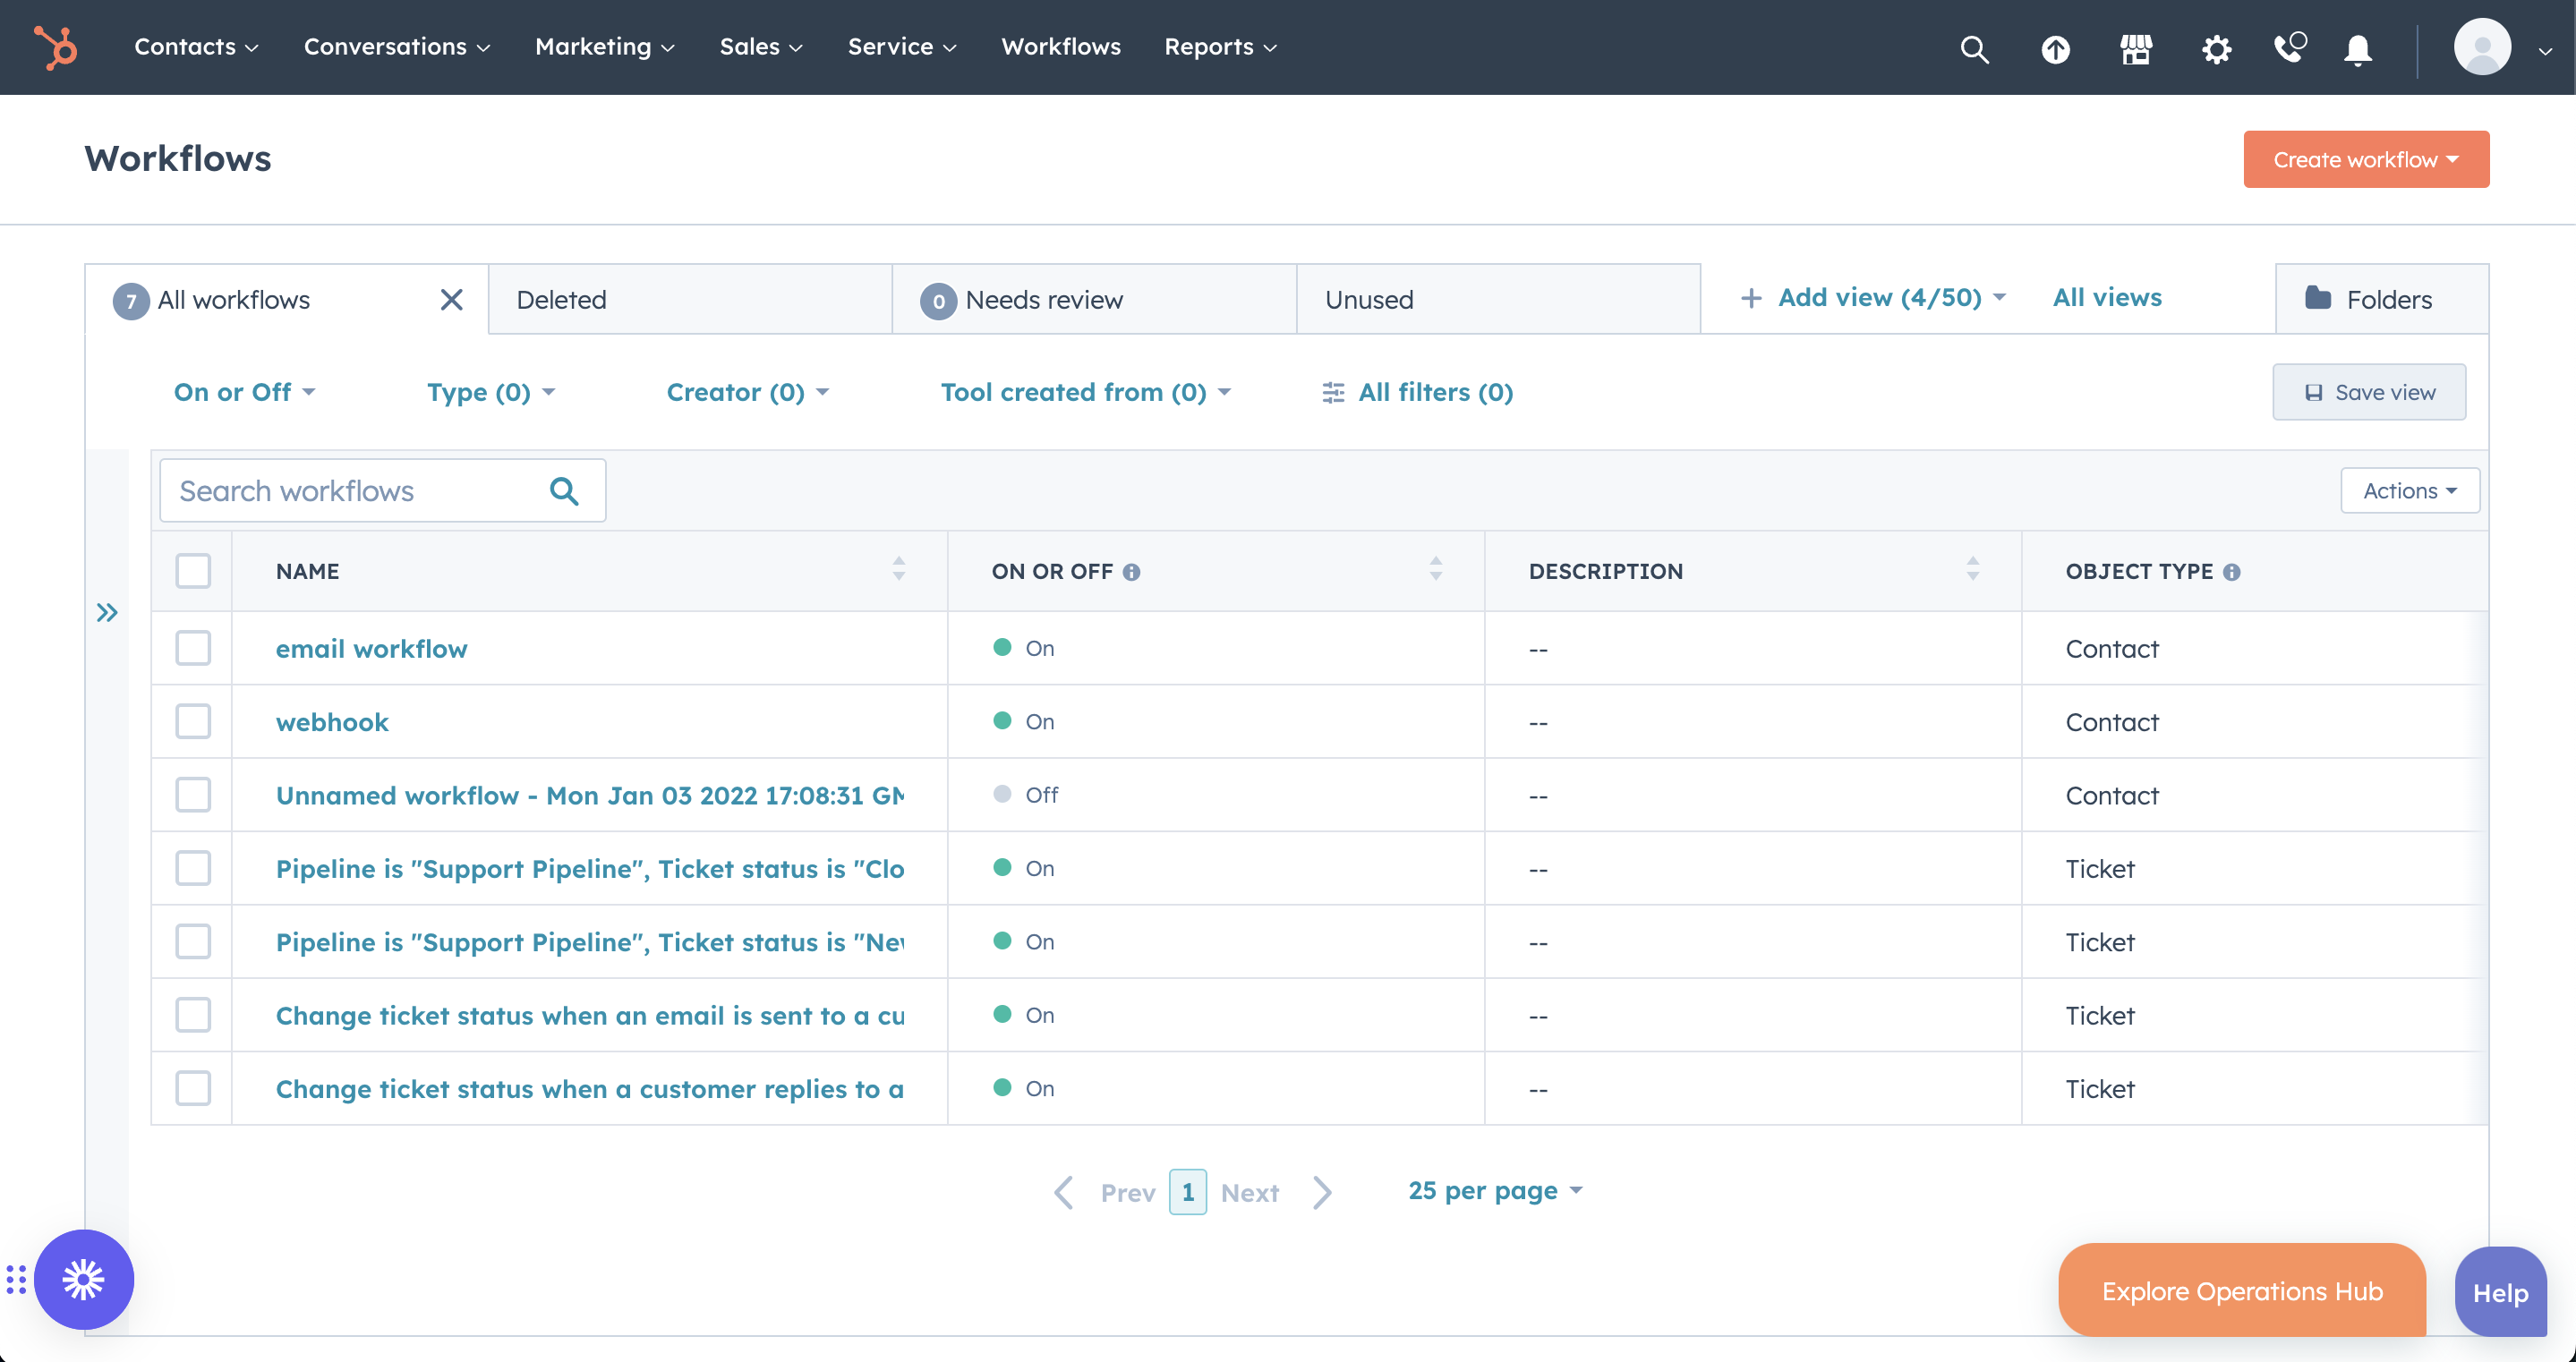
- Click "Create workflow" and choose "From scratch" (or use your own template).
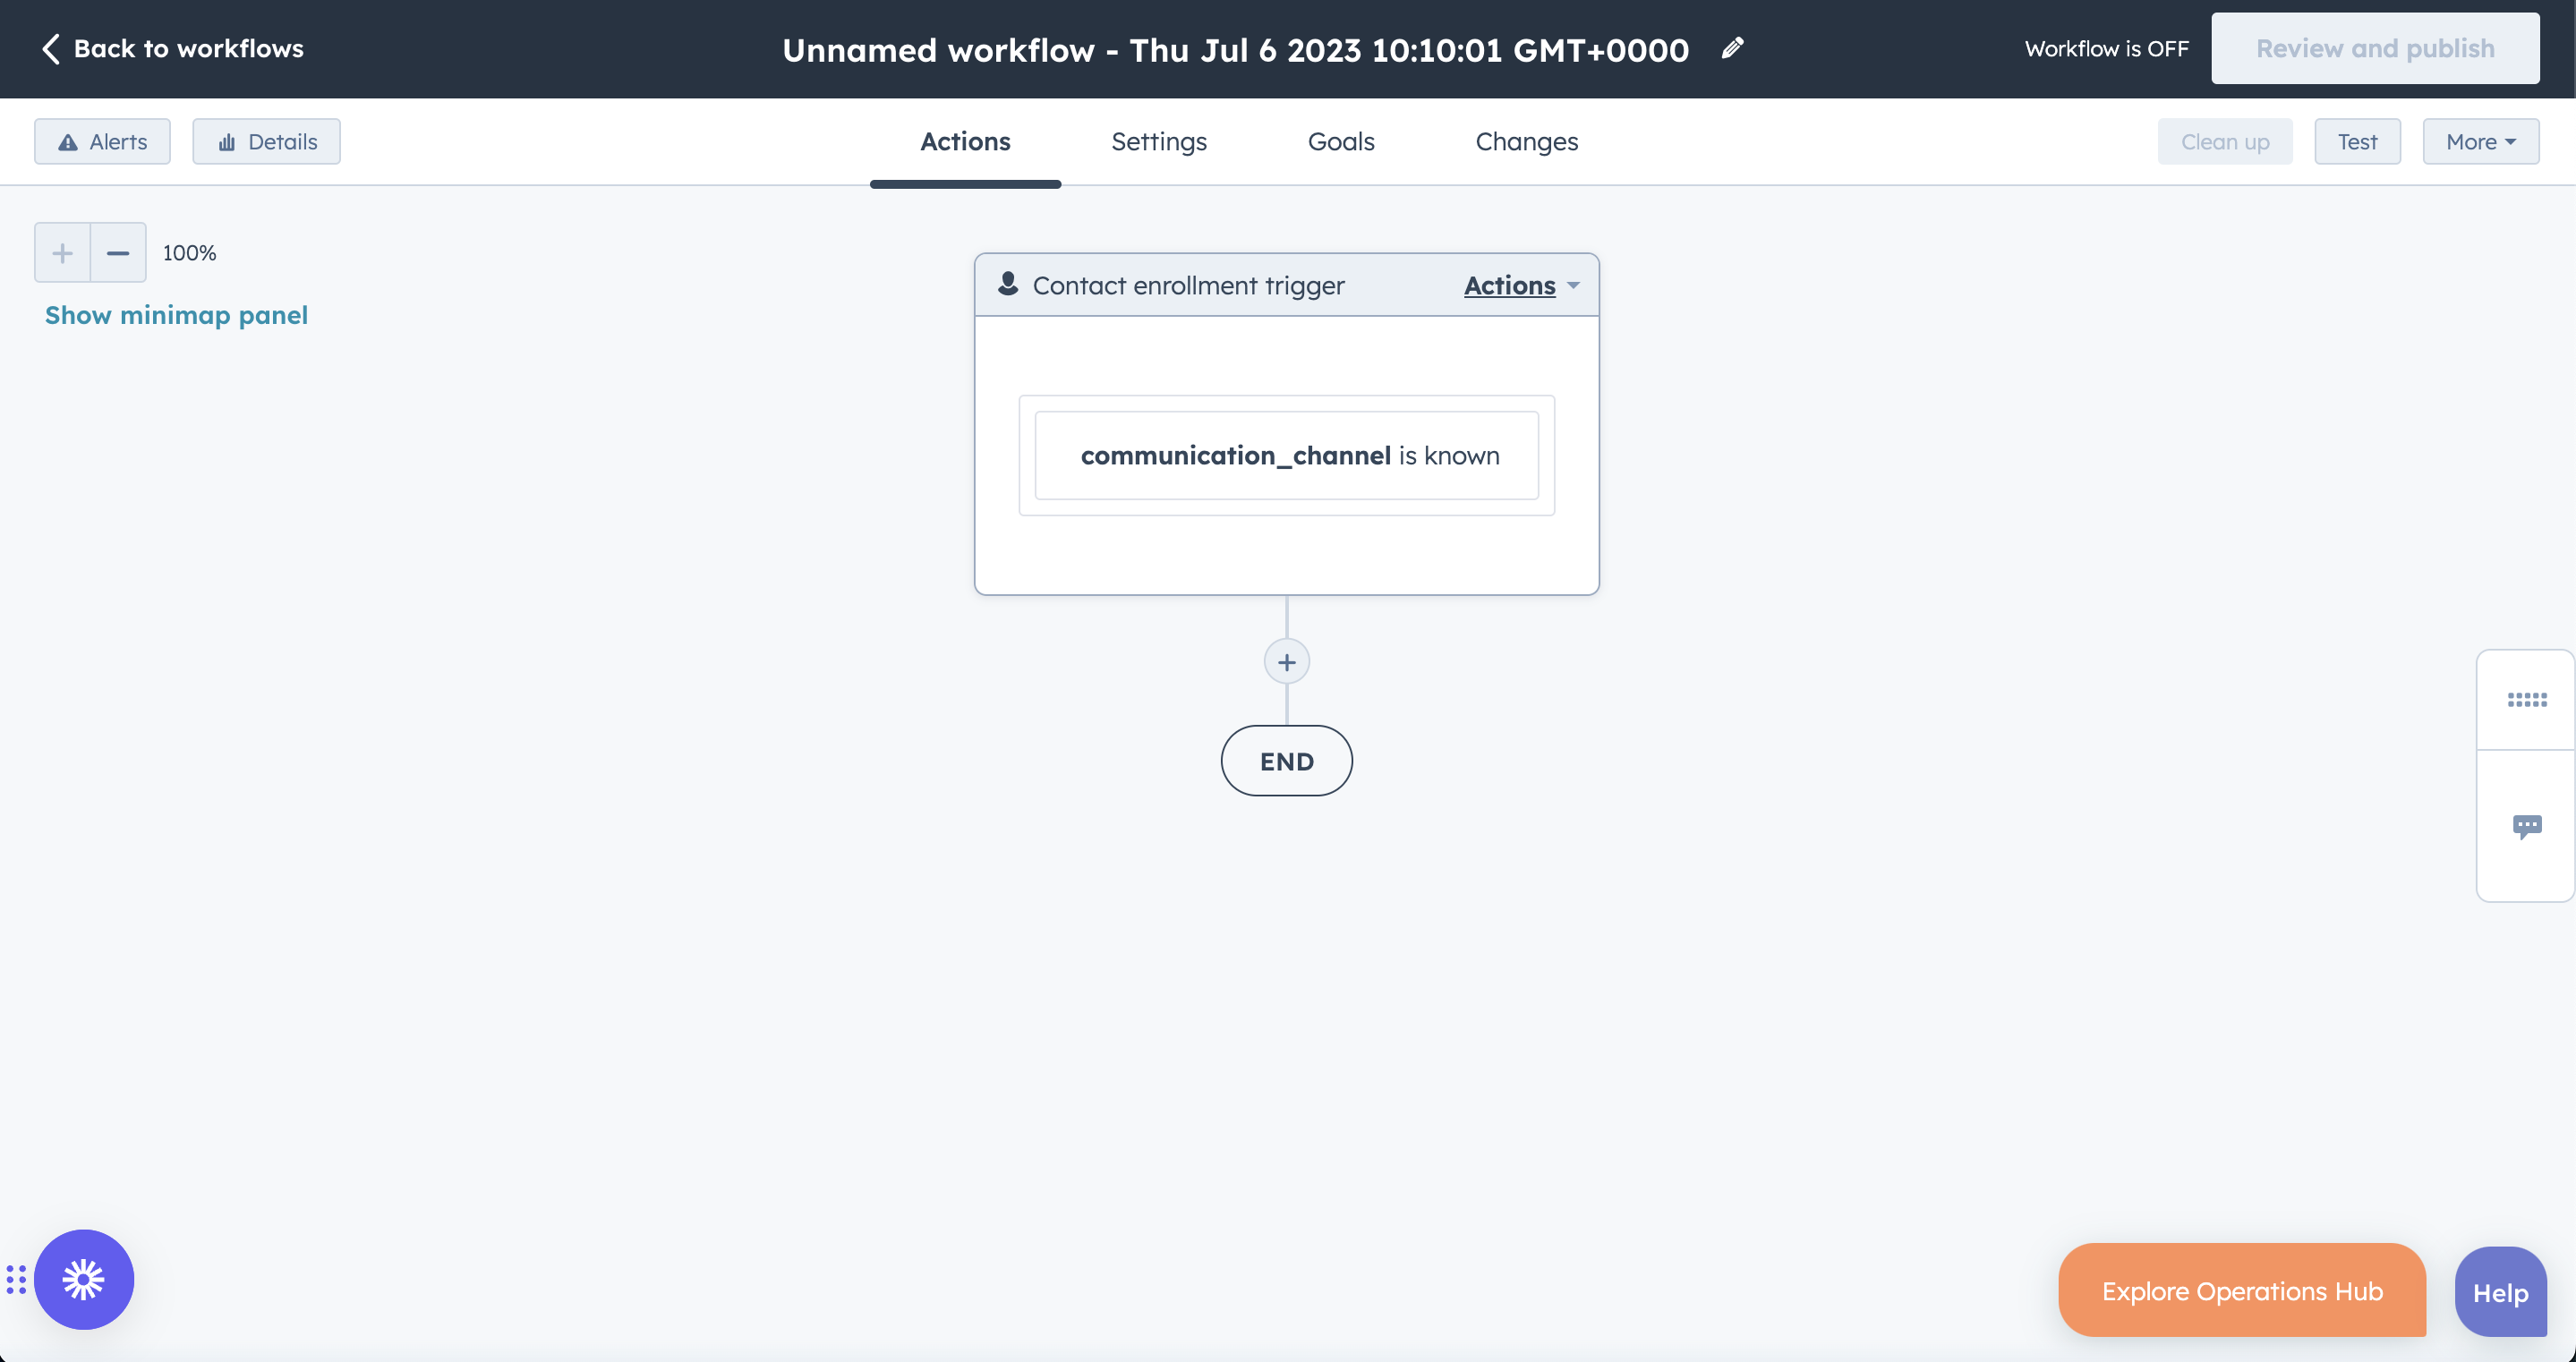
- Click Set up triggers > Choose "When filter criteria is met": then choose the contact changes that will trigger the data push to Didomi.
⚠️ Important notice: make sure the contact properties you choose in the trigger step are already part of the mapping previously carried out in the Didomi Console.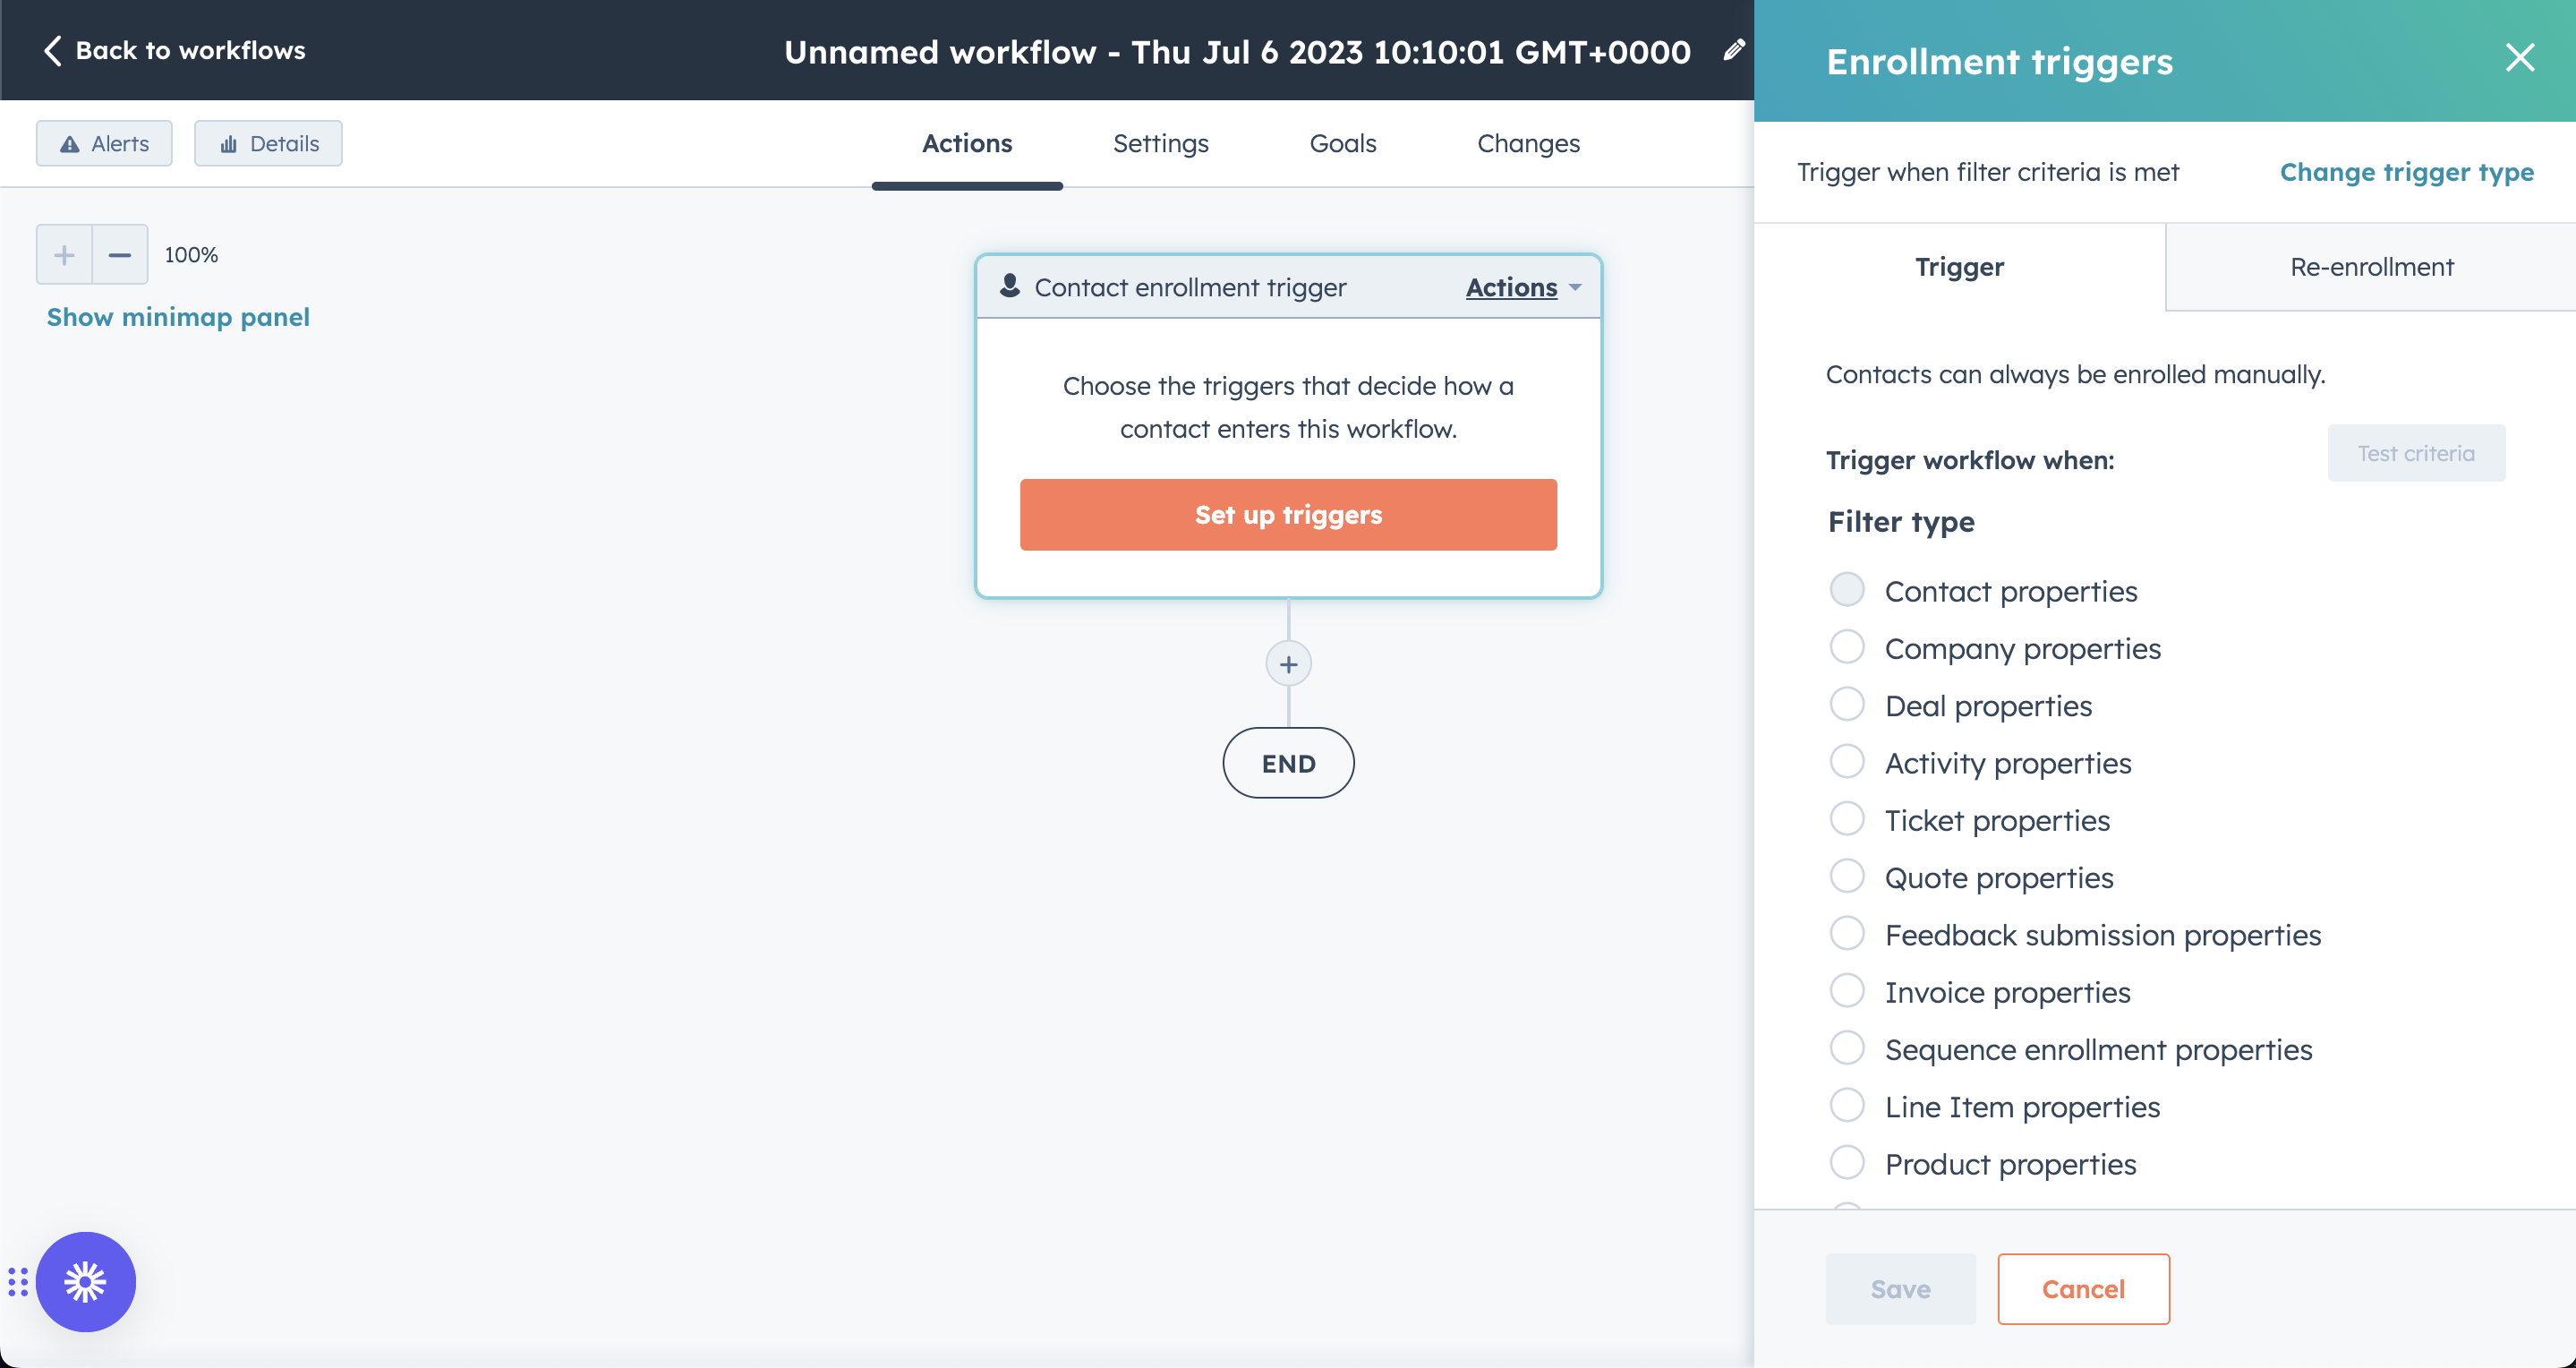
- Add an action > Property management > Increase or decrease property value.
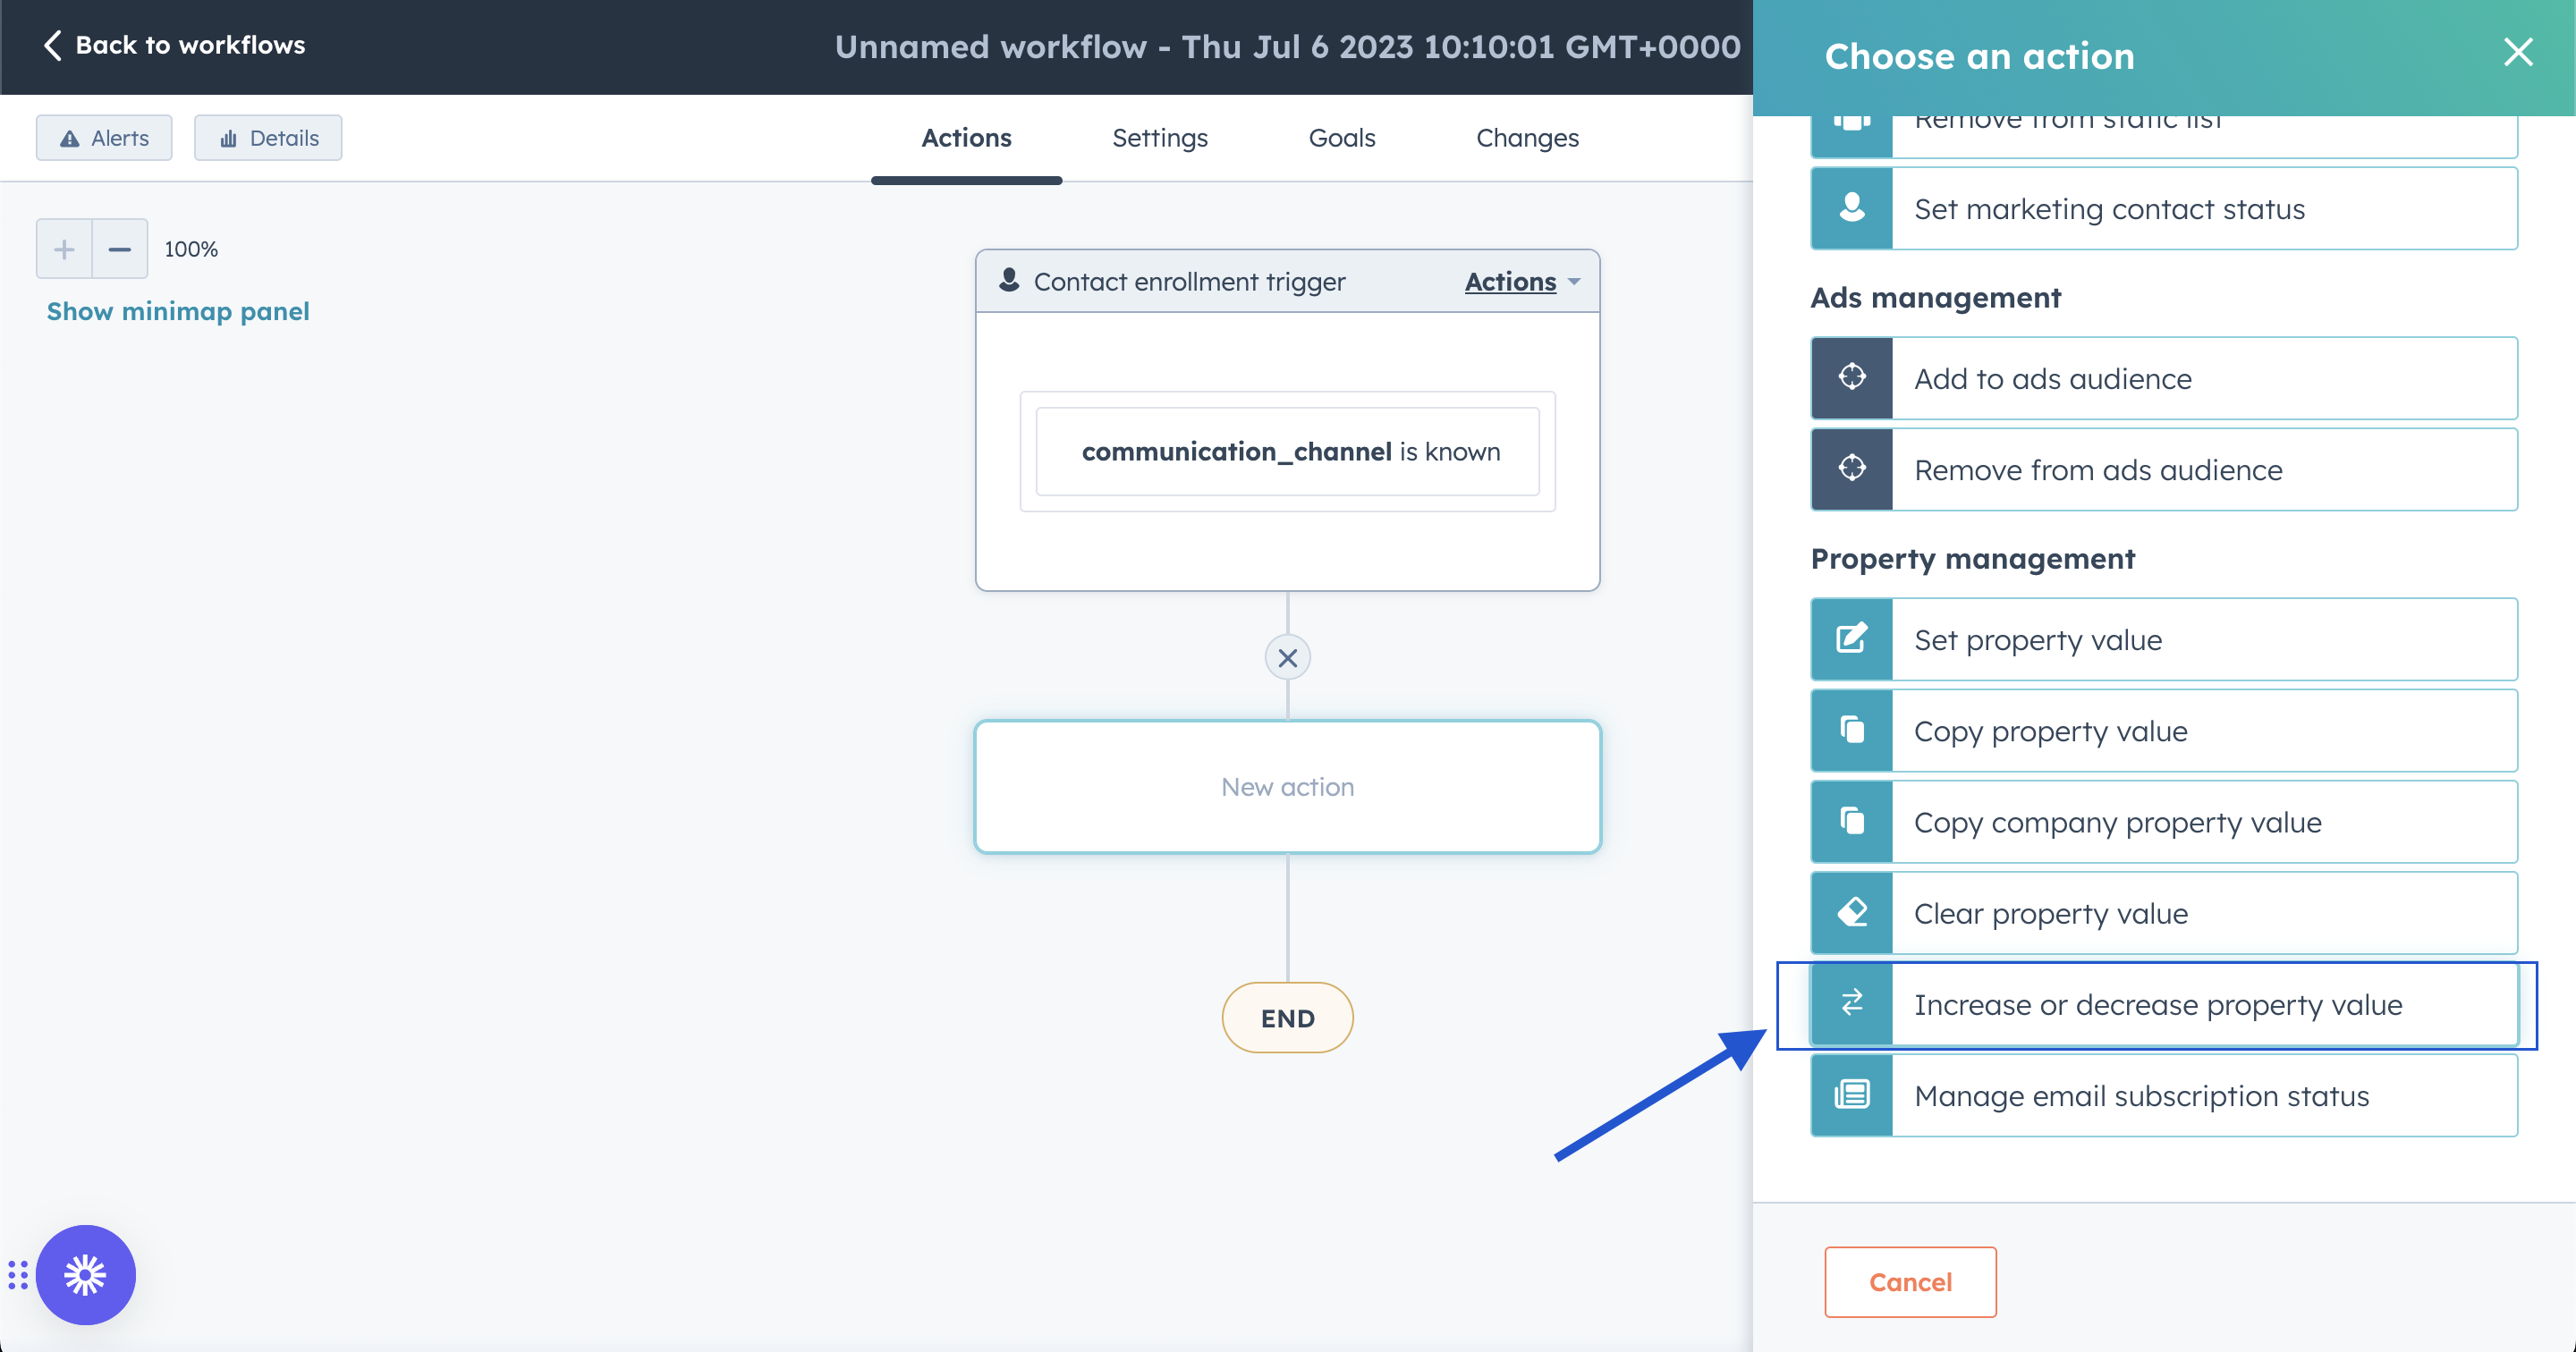
- Select Didomi Changed (previously when you have enabled "Bidirectional flow" in the Didomi Console, we created a Hubspot contact property called "Didomi Changed" on your behalf.)

- Click "Review and Publish".
- Select if you want to enrol existing contacts.
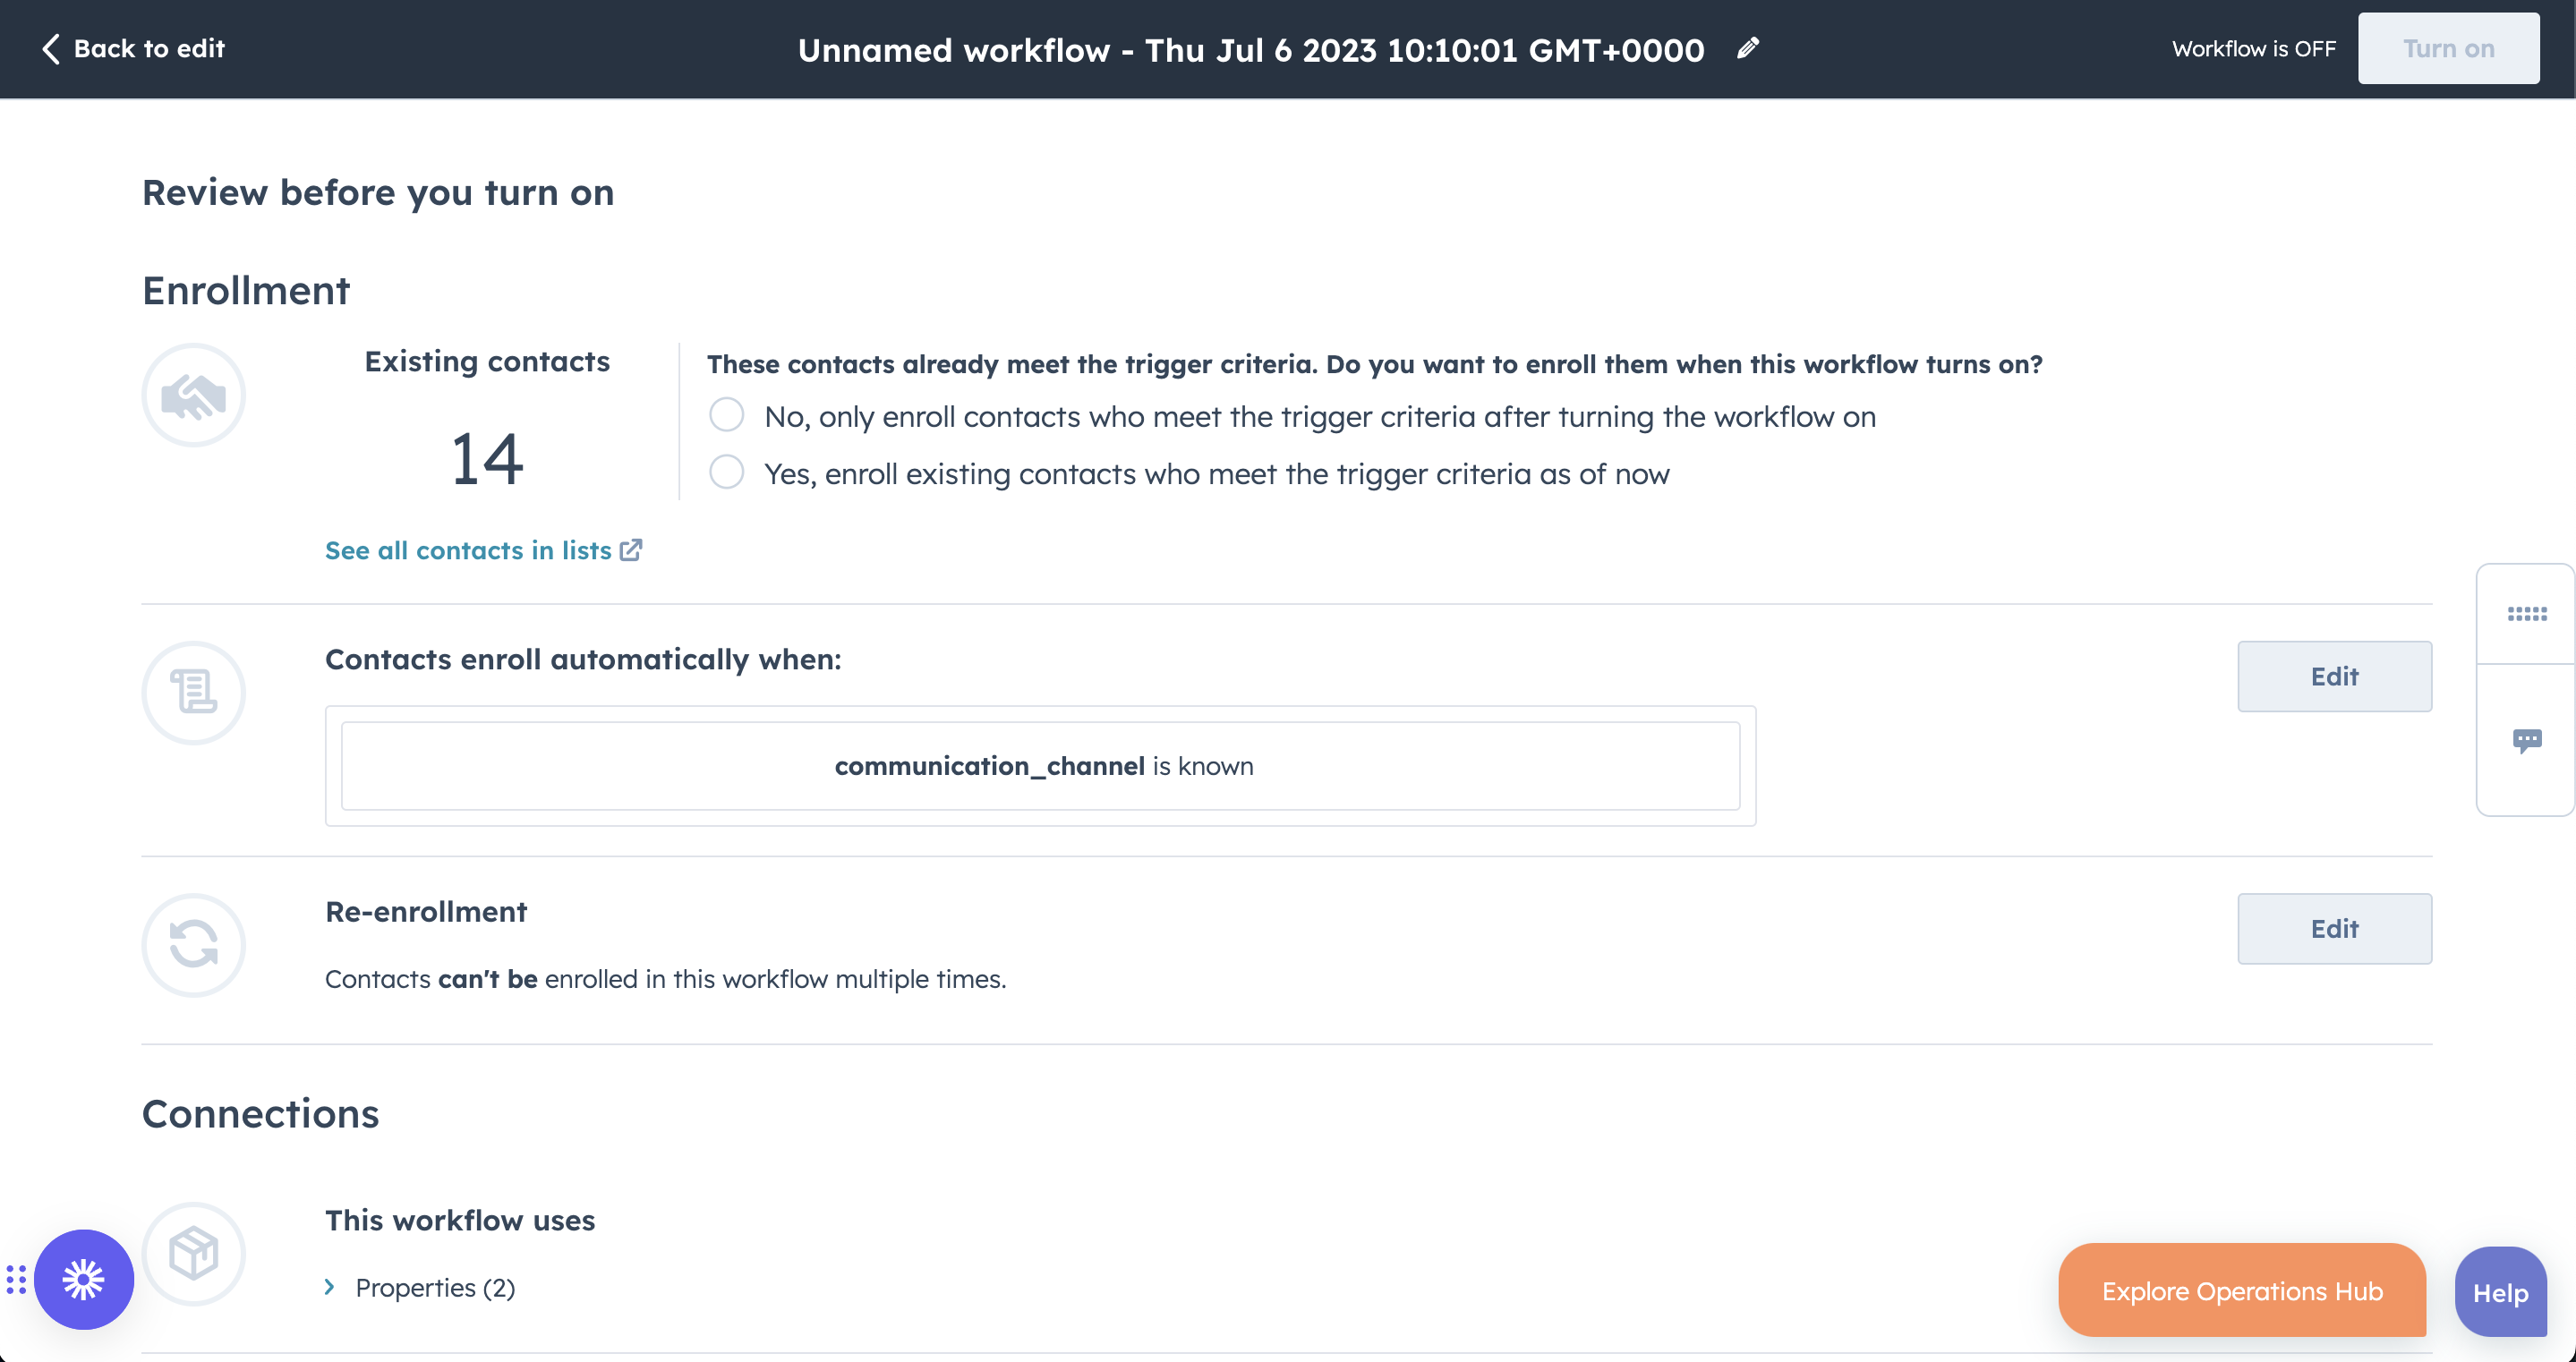
- Next to "Re-enrollment" click on the "Edit" button.
- In the right panel enable Re-enrollment and select all the triggers below. Then click on "Save".
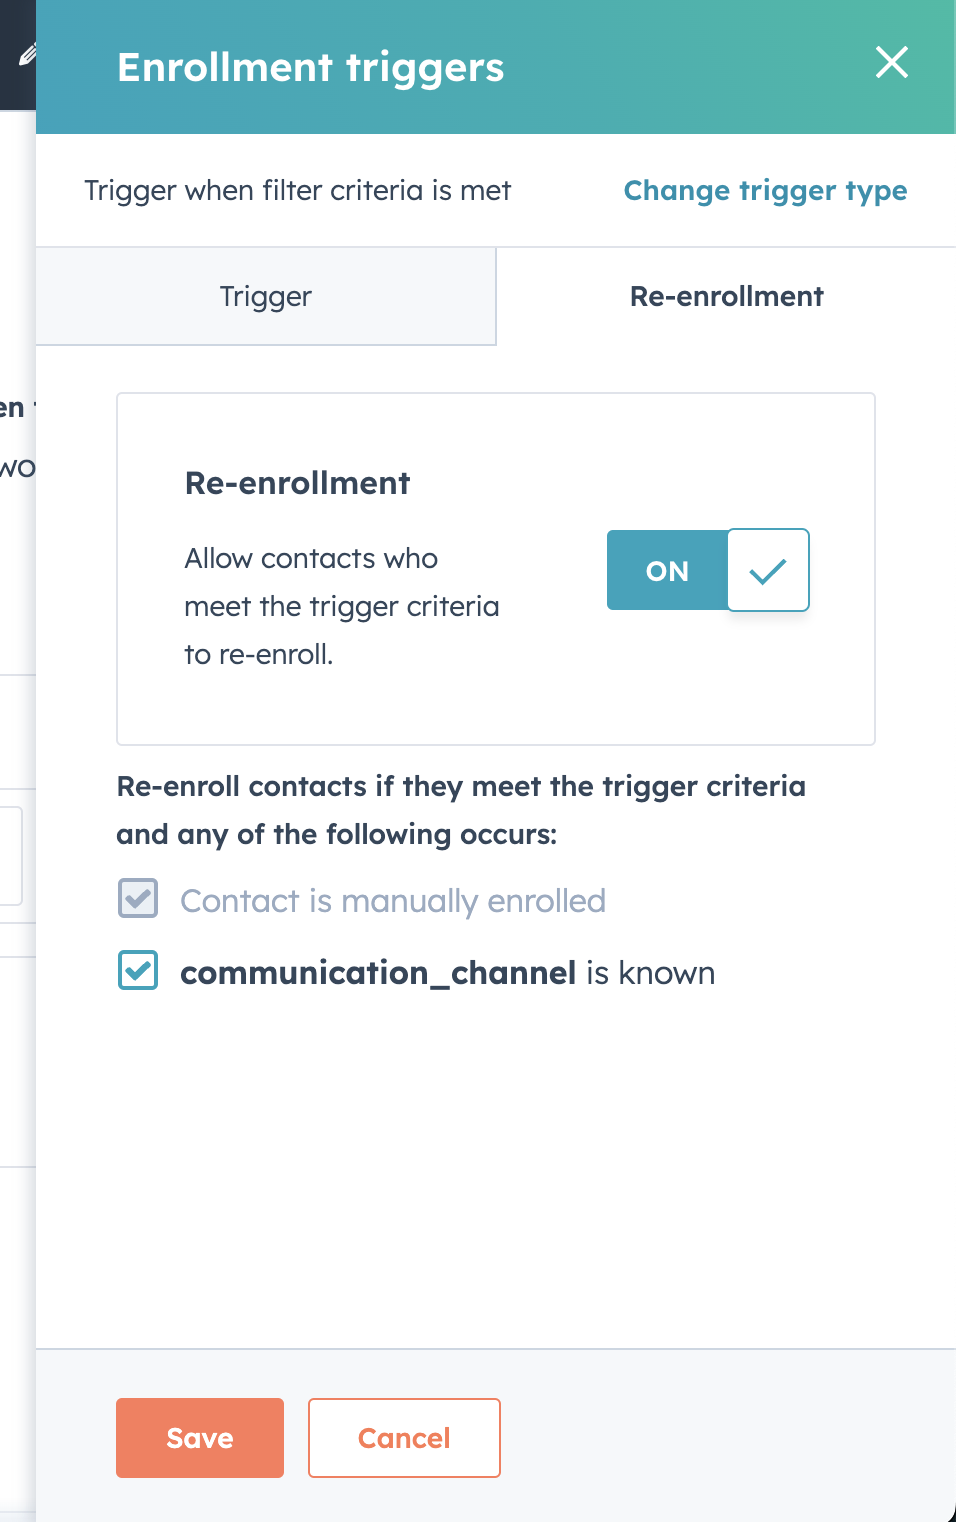
- At the top right of your screen click"Turn on" to enable your workflow.
💡 Good to know
Whenever the "Didomi Changed" property is incremented by 1, a webhook call is sent to Didomi to push the new contact creation/update.
Learn more about the Didomi - Hubspot integration in our Developer Documentation.