Didomi allows you to push your lead and contact data to both Salesforce Sales Cloud and Service Cloud, while collecting user preferences through Didomi Preference Management.
💡 You only need to set up a single integration to sync both Sales Cloud and Service Cloud with Didomi.
Make sure you have your Salesforce Sales and Service Cloud premium feature enabled. Contact our support team to learn more.
Step #1 - Fetch your Salesforce API credentials
- Log in to your Salesforce Developer Portal
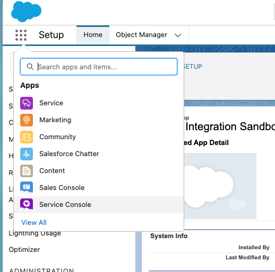
- Go to Apps > App Manager and click "New Connected App"
- Fill in the form to create the Didomi integration app
- In "API (Enable OAuth Settings)", make sure that:
- "enable OAuth Settings" is selected
- "Selected OAuth Scopes" has Full access (full) selected
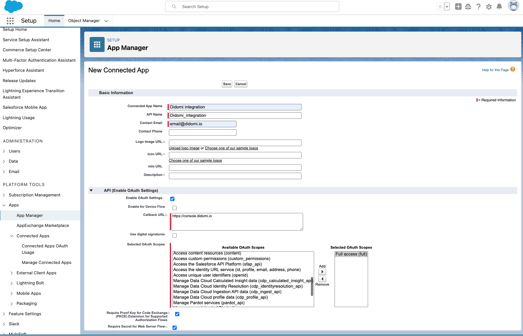
- Click Save, then Continue.
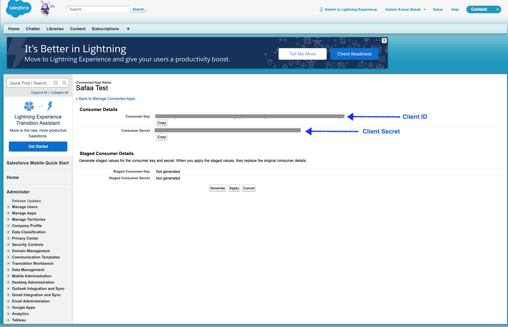
- Click on "Manage Consumer Details".
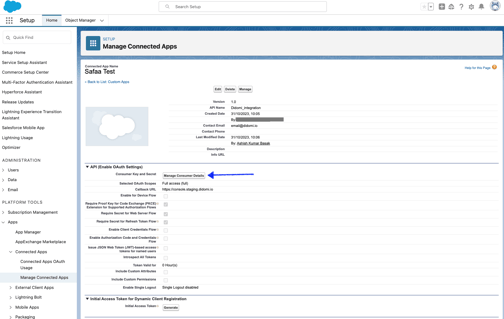
- Obtain your Client ID and Secret, which will be used in Step#2 below.
Step #2 - Enable your Didomi-Salesforce integration
Once your connected app is created in the Salesforce Developer portal, you can proceed to finalize your integration config in the Didomi Console.
Navigate to the Didomi Console, click on the Marketplace module in the left menu, then follow these steps:
Settings
- Add the Client ID and Client Secret previously collected in Step #1 above.
- Add your token URL: this is the base URL of the authentication endpoint of your Salesforce server.
- For example, if your authentication URL is: https://my-domain.sandbox.my.salesforce.com/services/oauth2/token
- Then only insert the base URL like this: https://my-domain.sandbox.my.salesforce.com
- Select which Salesforce object you would like Didomi to synchronise consent data to: Contact or Lead.
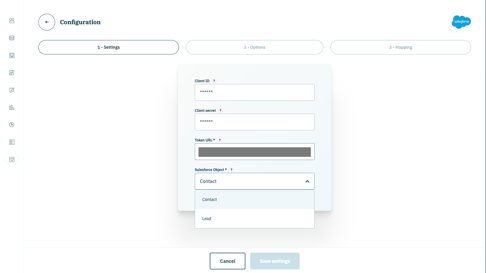
- Click on "Save Settings".
If you are willing to synchronise both Leads and Contact preferences within the same Didomi organization, please contact our support to get a new integration config.
Options
- Upsert mode: by enabling this option, you authorise Didomi to create new Leads/Contacts while pushing user preferences to Salesforce.
-
If Upsert mode is enabled: Didomi will check if the organization_user_id (provided when the user submits their preference on Didomi's Preference Management widget) matches the email address of a Lead/Contact. If not, Didomi will create a new Lead/Contact in Salesforce database on your behalf.
-
Mapping
Make sure your Salesforce Lead/Contact attributes are already created in Salesforce before you start the Mapping step.
- For each purpose/preference/preference value, select the corresponding Salesforce Lead/Contact property from the Dropdown (scroll or search by name).
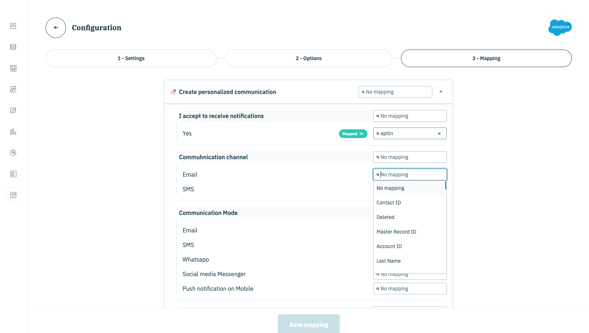
There are some rules when it comes to mapping Didomi properties with Salesforce properties:
- Purpose -> Boolean
- Preference -> string
- Preference value -> Boolean
Learn more about the Didomi - Salesforce Sales & Service Cloud integration in our Developer documentation.