The Vendor List Manager is designed to help you identify, qualify and manage the CMP vendor list for your website.
General overview
In a simple way, you can add or remove vendors to your list and then export the list for use in building your CMP notice.
The main goal is to have the number of detected vendors equal to the number of vendors declared in the CMP.
The second goal is to get rid of vendors which are not active anymore on your website to reduce your vendor list.
In the Vendor List Manager you have 3 main parts :
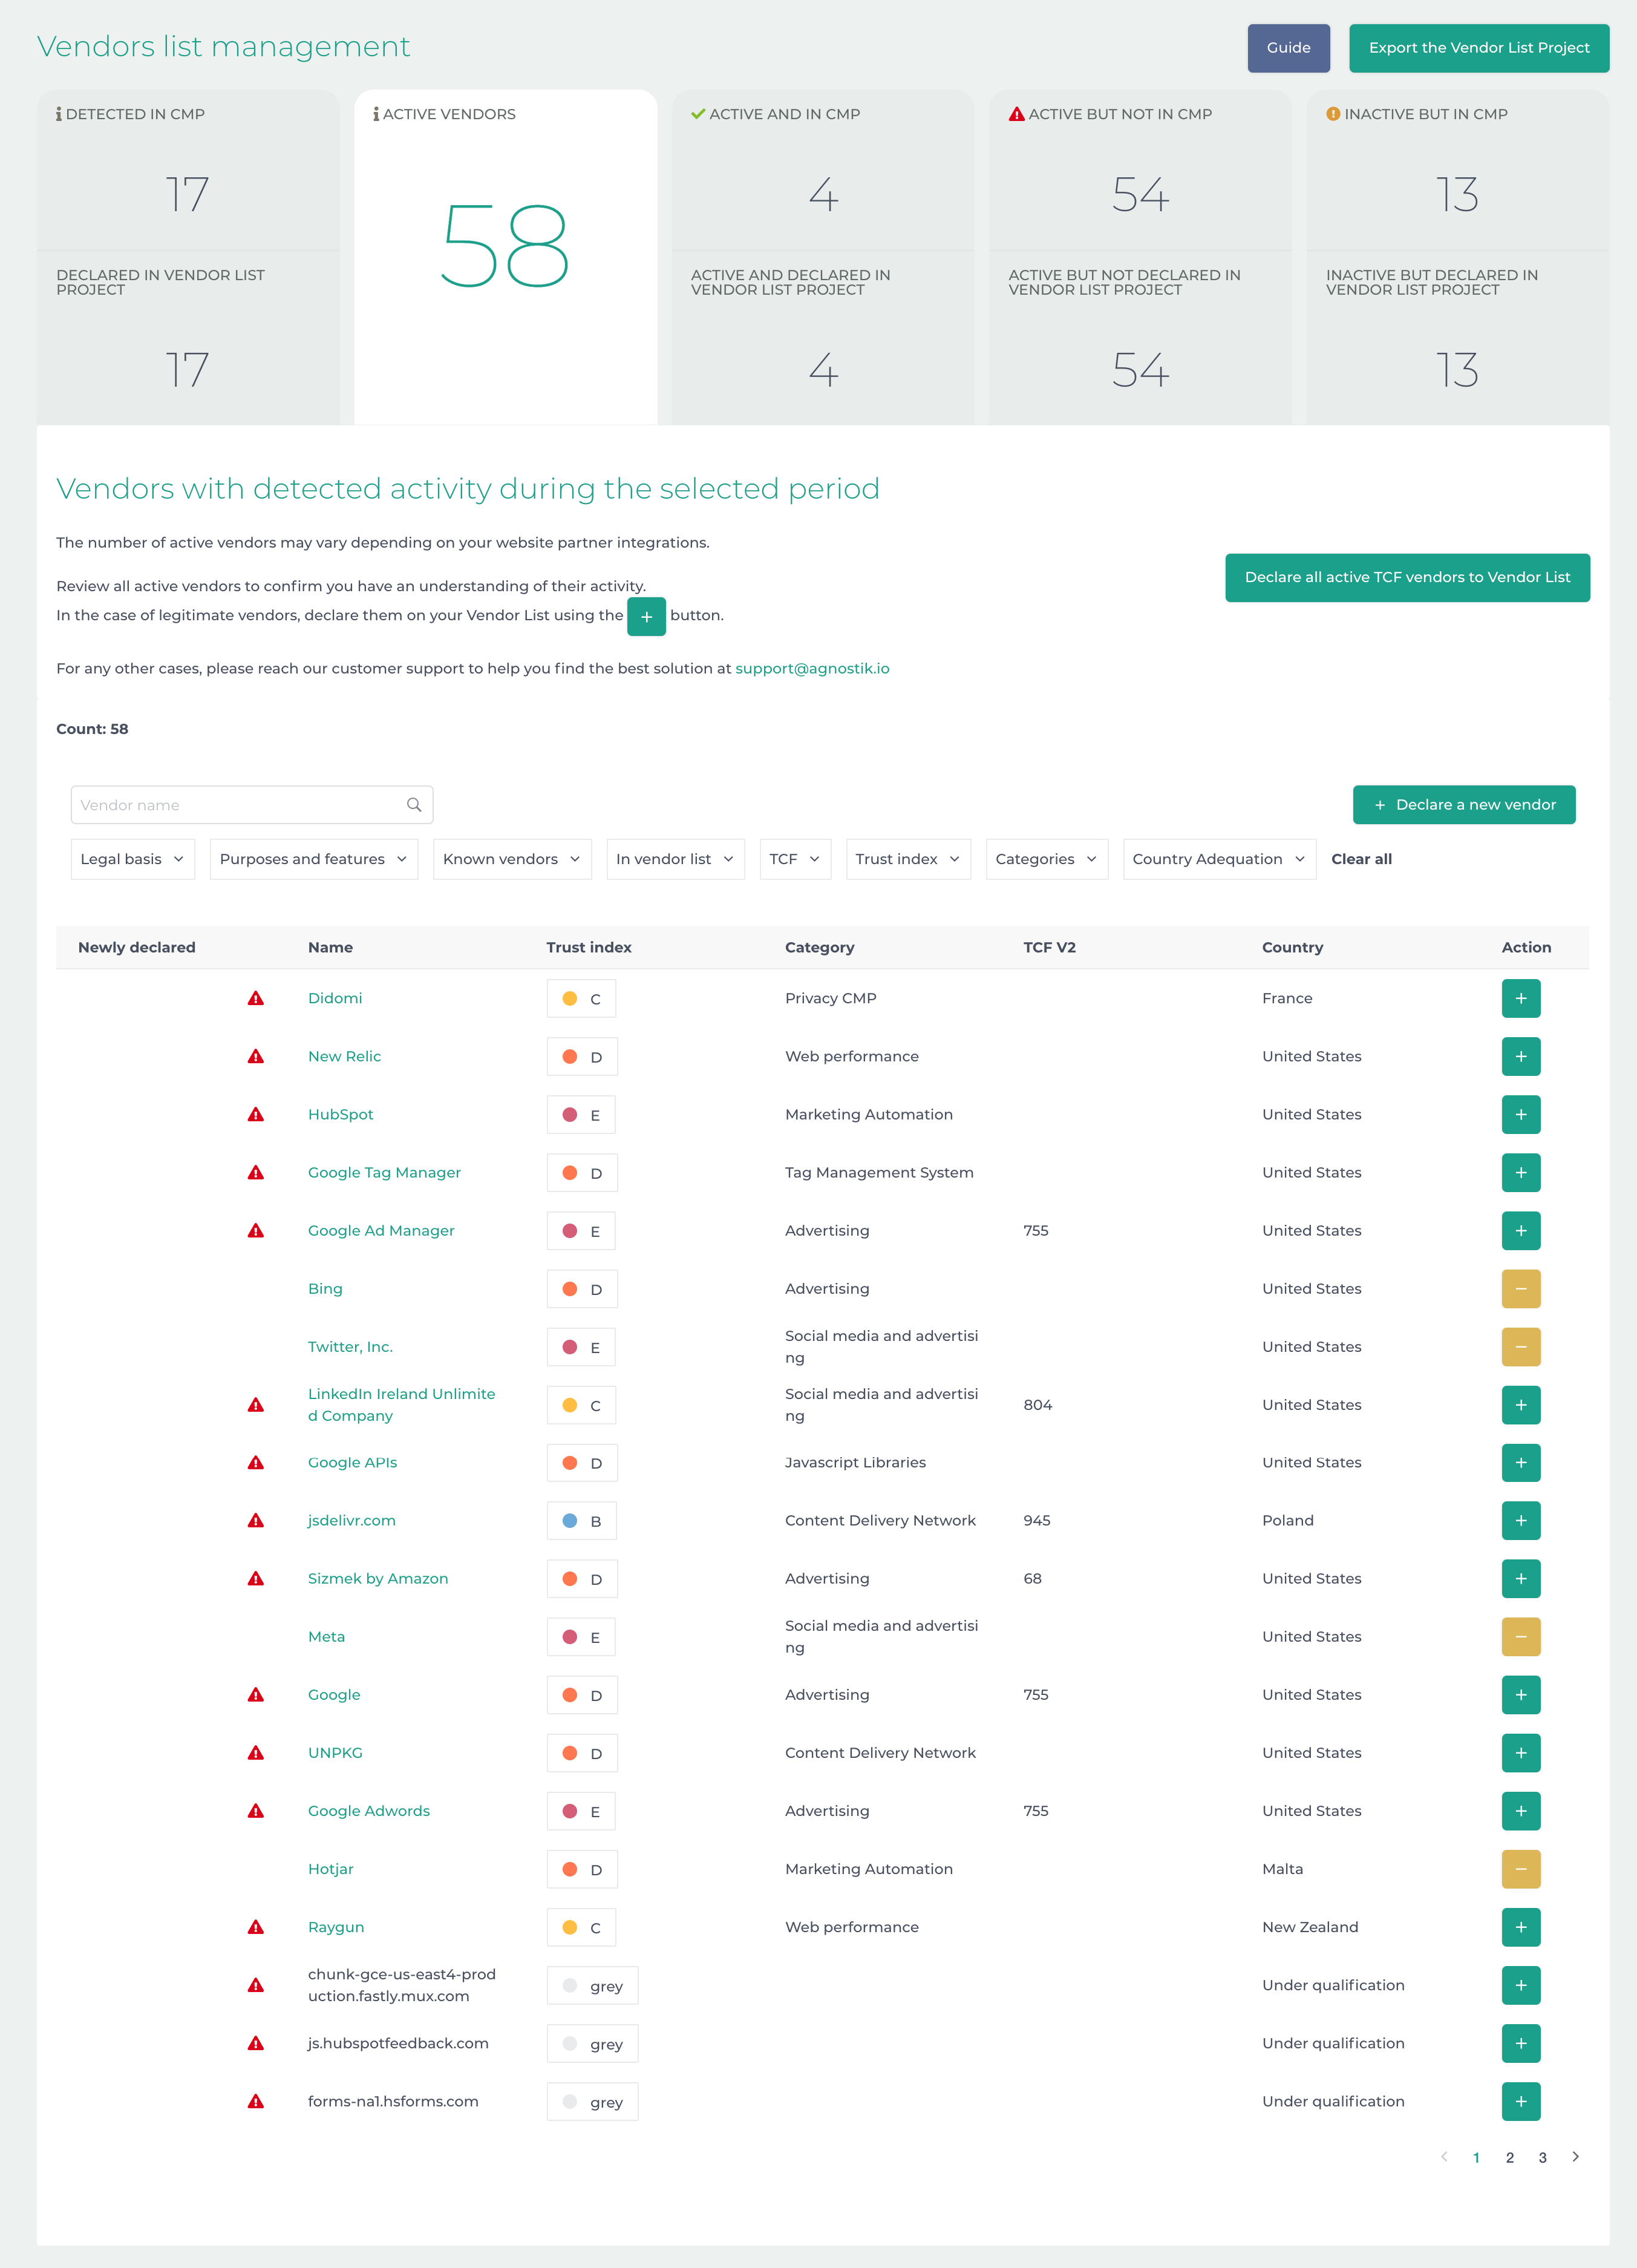
Key indicators
This part provides indicators regarding the vendor on your website.
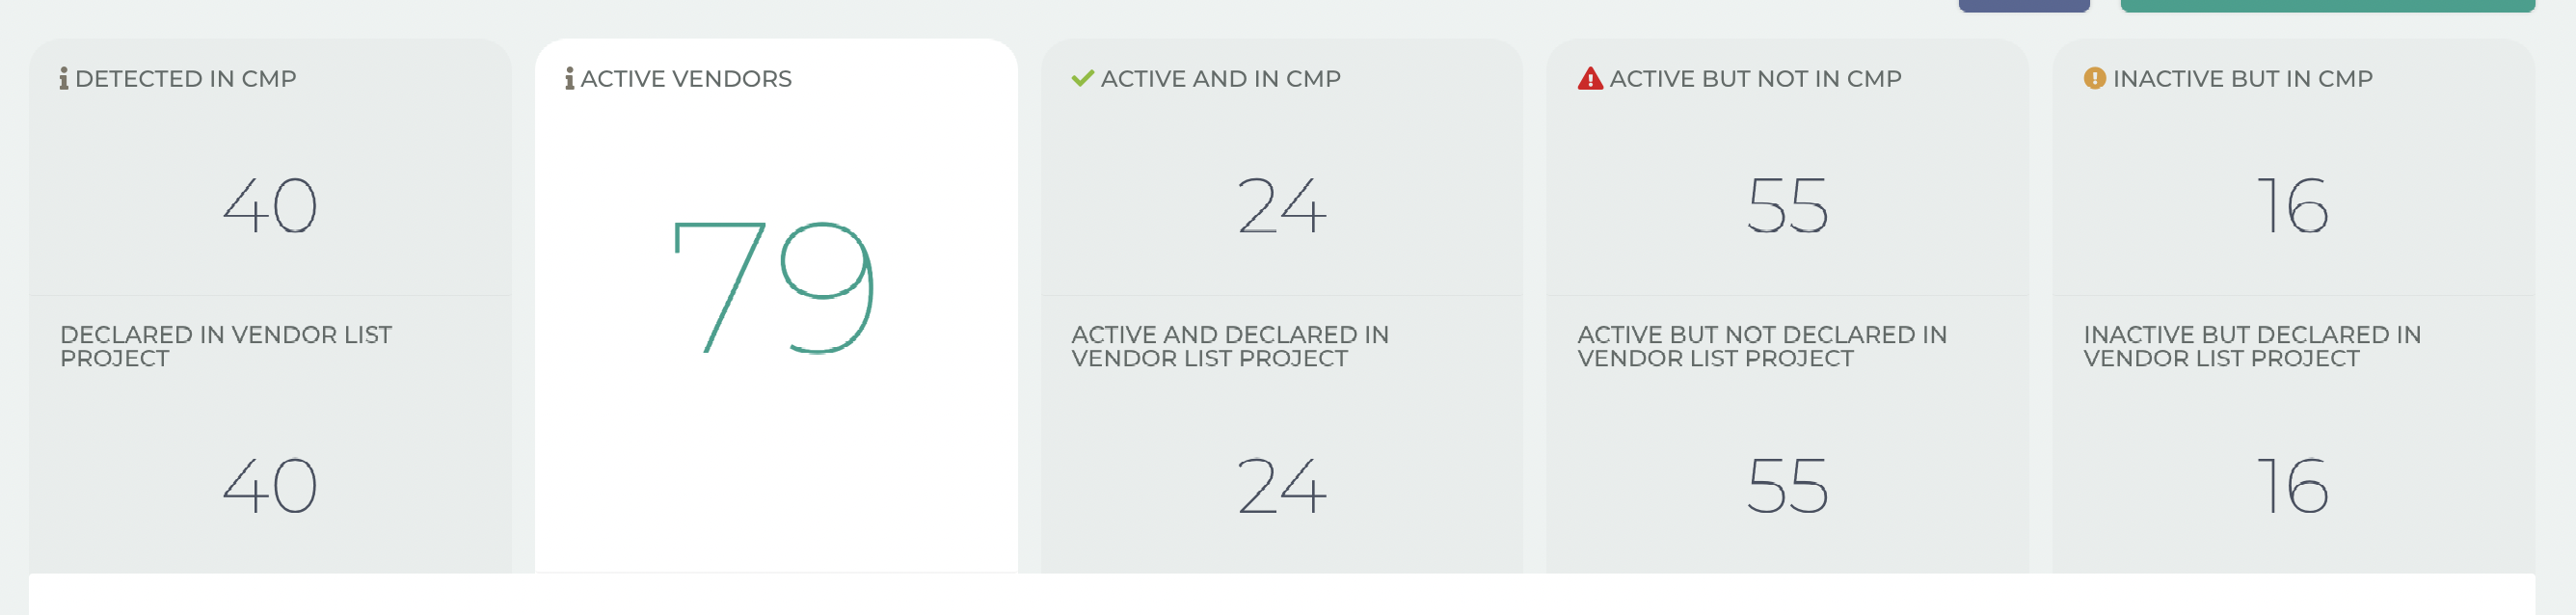
The first line displays information about your current environment following a scan,
the second line is a projected view of your future environment once you have updated your CMP.
The main indicators (those of your current environment) are clickable. Each of them will give a specific view on the table below.
Informative text

For each main indicator, an informative text accompanies it to help you understand the information displayed or the actions you can take.
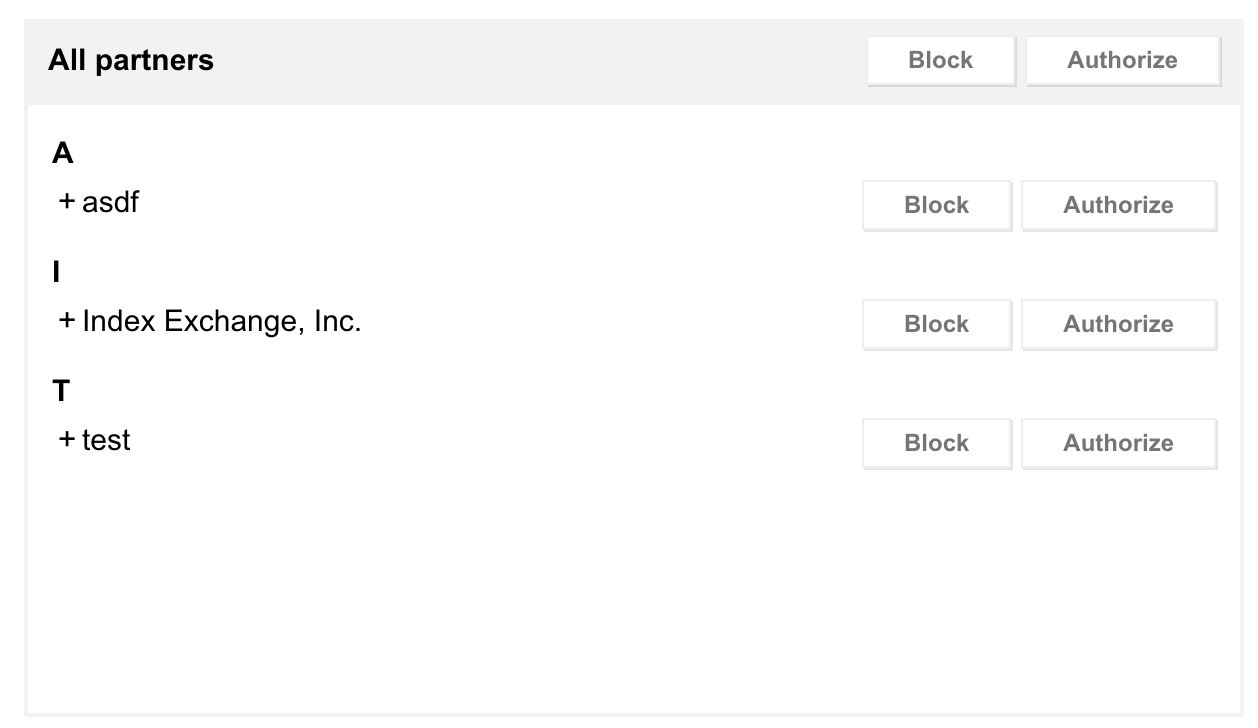
Table

The table allows you to have detailed information on the vendors like its name, its category or its trust index.
Section details
Here you have a detailed information about each section.
All indicators are related to the selected period.
Vendors detected
This section displays all vendors that were detected on your website.
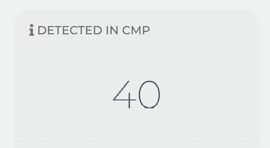
Detected in CMP
This section displays vendors that were detected on your CMP’s website (active or not).
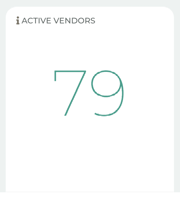
Active and in CMP
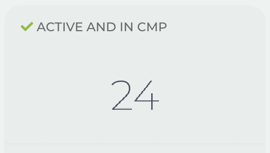
This section displays vendors that are active and declared in your CMP.
Active but not in CMP
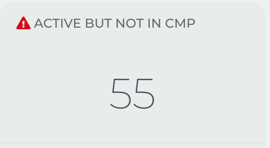
This section displays vendors that are active but are not declared in your CMP.
To be in compliance with the law you must declare these vendors in your CMP.
We recommend that you add these vendors to your vendor list in order to update your CMP.
Ideally this number should be equal to 0.
Inactive and in CMP
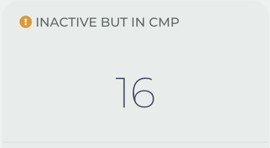
This section displays vendors that were detected on your CMP but were not active for the selected period.
We recommend to remove these vendors in order to reduce your vendor list.
Projected vendor list

This part represents your ongoing project.
When you declare a new vendor or remove one, those indicators will show you the result of your actions.
Declared in this vendor list project
This represents the state of your future vendor list once you have exported your project and updated your CMP.
![]() This icon indicates that the number of vendor has increased
This icon indicates that the number of vendor has increased
![]() This icon indicates that the number of vendors has decreased
This icon indicates that the number of vendors has decreased
Table

The table allows you to have detailed information on vendors
- Declared : if the vendor is newly declared in the vendor list
- Vendor name
- Its trust index
- Its category
- If the vendor is in the IAB TCF V2 or not
- Its country
You also have the ability to add or remove a vendor from your vendor list directly with the last column
Filters

When you want to search for a specific vendor you can type its name on the search bar.
You can also use filters to be more precise in your research.
All the filters are cumulative and you can select multiple of them.
For example, you can search for vendors that only declared Consent as legal basis and in the TCF with a trust index of D.


When you are done you can click on the Clear all button to clear all filters.

Vendor details
By clicking on the vendor name you can access the details of it.
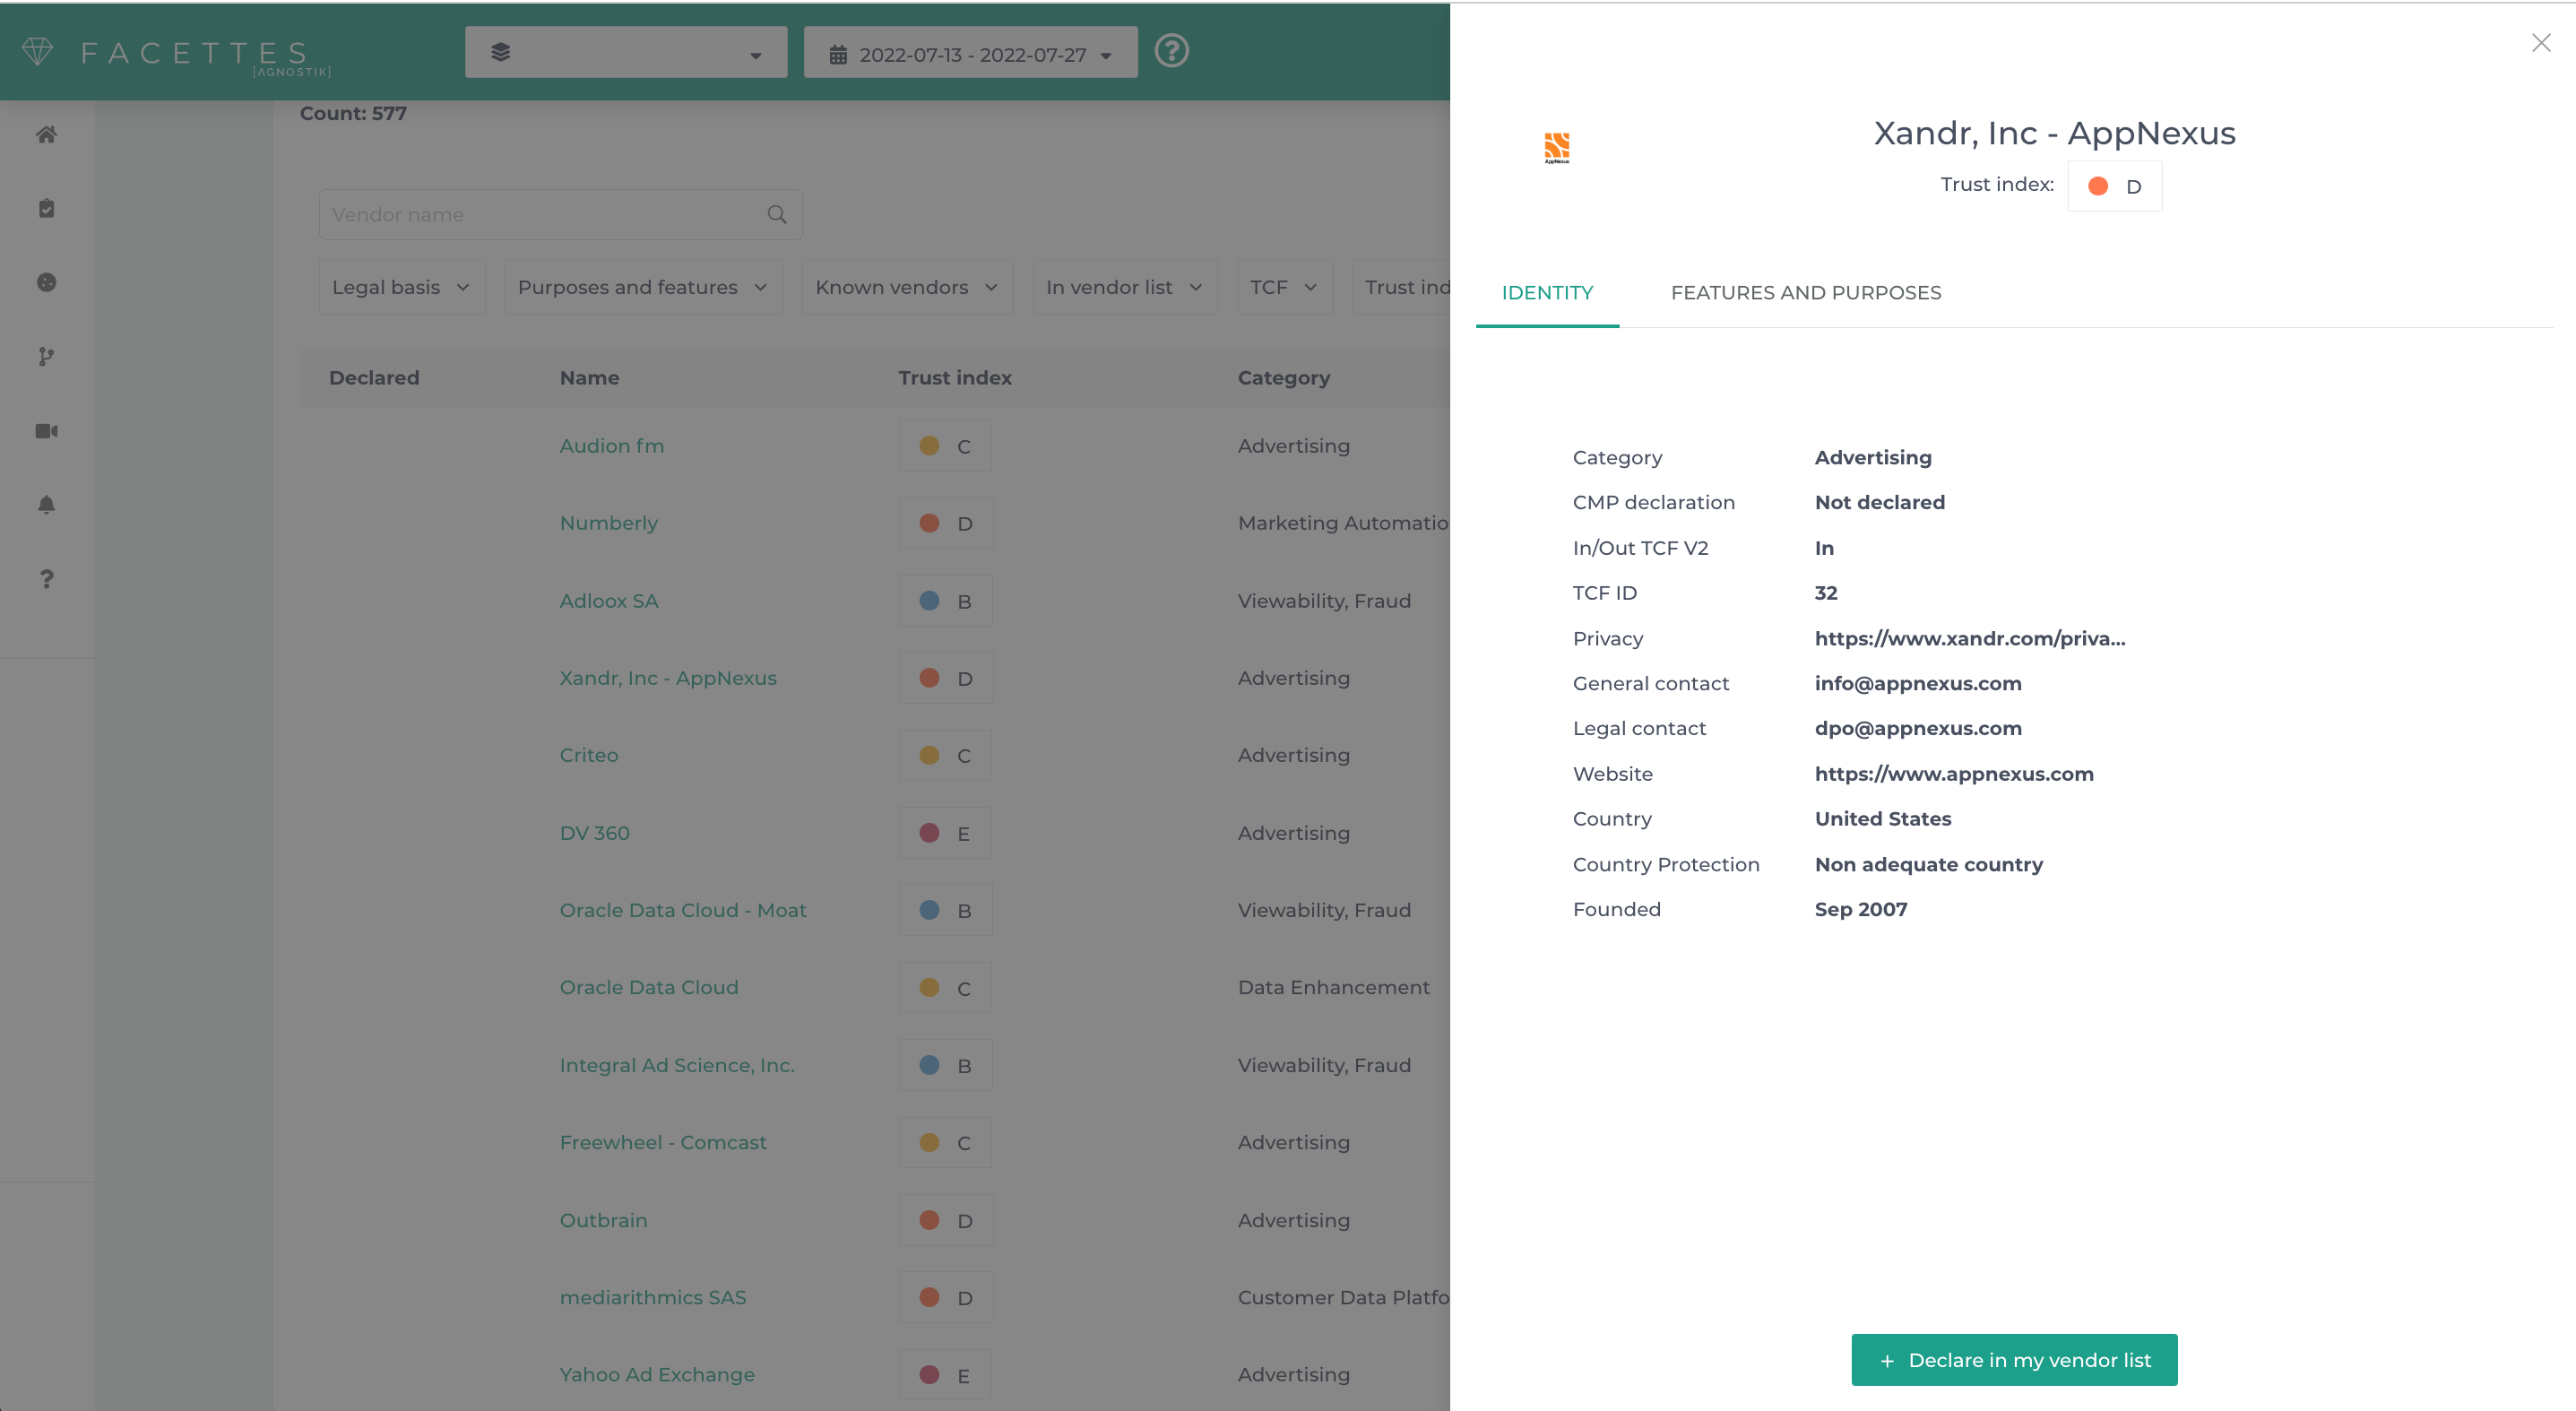
By clicking on FEATURES AND PURPOSES tab, you access the vendor's configuration regarding the legal bases associated with the purposes and features.

How to
How to add a vendor to the vendor list
Click on Active but not in CMP indicator
Choose the vendor you want to add on your vendor list, and you can either:
- click on the + button
It will open a popin that will ask you to select purpose and feature for this vendor
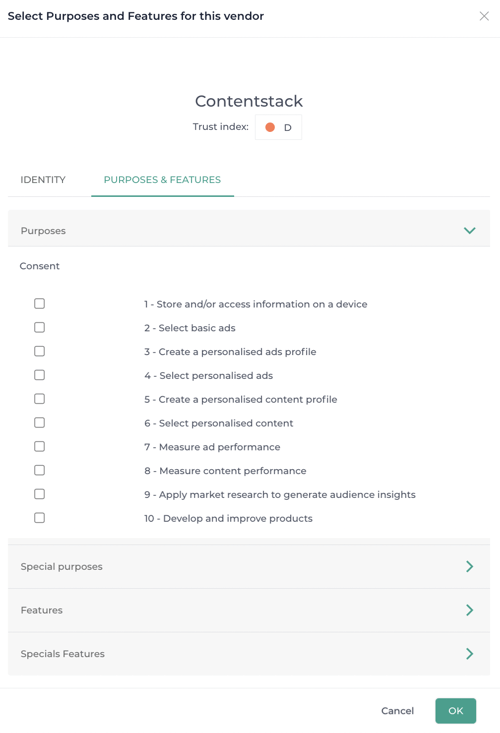
Once you have selected one or several purposes & features your will be able to add it to your vendor list.
A confirmation message will then appear

How to remove vendor from the vendor list
Click on Inactive and in CMP indicator
Choose the vendor you want to remove from your vendor list,
Click on the - icon
![]()
A confirmation message will then appear.

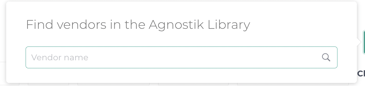
How to search for a specific vendor
Click on the search bar
![]()
Type the vendor name.
If the vendor is detected on your property it should be displayed on the table
If not, 2 cases
- 1- the vendor isn’t active on your website or declared in the CMP
- 2- the vendor is considered as unknown, meaning we have detected a domain without a vendor associated to it. (see Unknown vendor section for more details for this case)
How to add a vendor that is not on any list on Facettes
If you want to declare a new vendor that doesn’t appear on any table, you have the ability to add it manually.
To do it so, click on the Declare a new vendor button

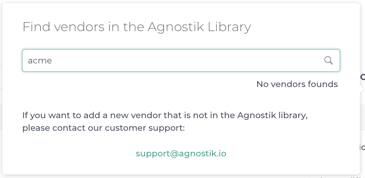
Search in the Agnostik Library to find the vendor you want to add
If the vendor is on the Agnostik Library you will be able to find it and declare it in your vendor list.
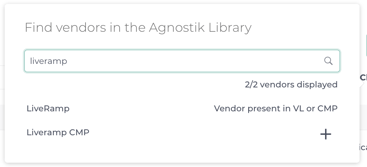
In the case of a vendor is already declared or detected, the system gives you the information.
If no vendor is found, contact Agnostik support to help you create a new vendor.
How to correct a wrong action
If you have added a vendor to your list by mistake, go to Vendors detected section, find it using the search field and press the -button
![]()
If you have removed a vendor from your list by mistake, go to Vendors detected section find it again using the search field and press the + button
![]()
Save & export
Once you have finished working on your vendor list, go to the detected in the CMP section and click on the Export the Vendor List Project button.

It will automatically download 3 files
- a CSV file
- a JSON file
- a Didomi compatible JSON file
❗In the case there are vendors with no selected purposes in the vendor list purpose 1 - Store and/or access information on a device will be assigned by default
❗If a privacy policy is not associated with a vendor, the vendor's website will be assigned as the privacy policy link. In case that does not exist as well the field will remain empty
ℹ️ Note that your browser can ask you to validate the downloading of multiple files simultaneously
Update my vendor list
ℹ️ Note that this feature doesn’t allow you to publish anything directly on your CMP.
You must be careful to update your CMP so that the changes are taken into account for the next scan.
Update your CMP on Didomi’s console
From the Didomi compatible json you have just downloaded you need to check the information to make sure all data is correct. Once you are decide to apply the vendor list to your CMP go to your console https://console.didomi.io/
You need to create a new notice that will replace the current one or update the one you currently have.
In the behavior section,

at the bottom, you have a custom json section where you can copy/paste the json you just downloaded and validated.

It will add all the vendor that are in your vendor list.
Specific case
Unknown vendor
An unknown vendor is a vendor domain that does not have a vendor name attached to it.
In order to add it to your vendor list, you must associate a vendor with it.
On the Vendors detected section
Click on the Known vendors filter, and check Only unknown vendors
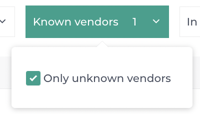
You will then be able to see all the domains that are not associated with a vendor

To associate a domain with a vendor you must click on the + button
![]()
By default the system will propose one or several vendors that could be compatible
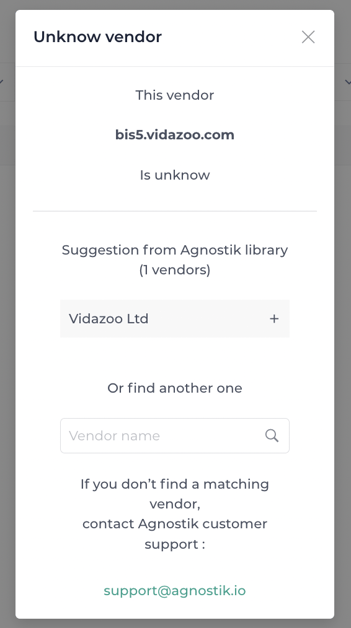
If there are no proposals or if the proposals do not correspond to the unknown vendor it will be necessary to contact Agnostik support to request the addition of the vendor.