Add your own standard texts in the Didomi console
👉The IAB TCF integration requires you to display a standard text on your banner. Didomi provides a standard text that has already been validated by the IAB.
👉If you do not wish to use Didomi’s text, you can use your own standard text that will be reviewed by our team, and add it to your banner directly from the Didomi Console.
⚠️ You have to do BOTH steps described below: submit the text in the console AND then send the email to support. If you just make the submission without notifying by email, your text will never be validated.
Submit your text in the console
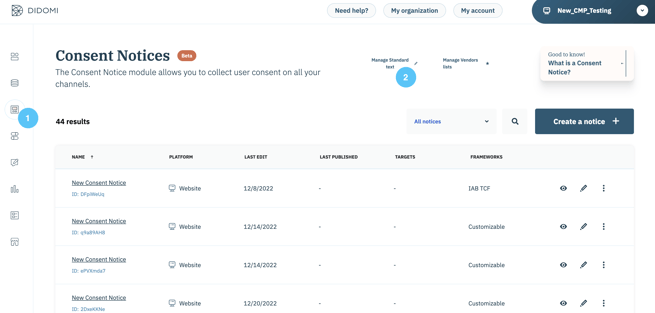
- Click on the Consent notices (1) section on the left side of your screen.
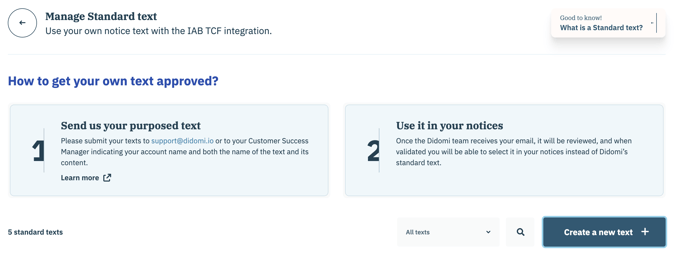
- Click on Manage Standard text (2).

3. Click on Create a new text + (3).

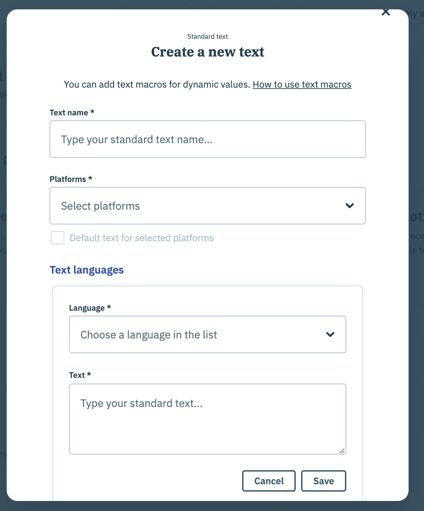
To submit your text:
- Give an internal name to the text.
- Choose the platforms where your text should be displayed.
- Select the language and add the content for the first language.
- Select the second language and add the content for the second language, etc.
- You can also indicate if your text does not include mentions of legitimate interest by unchecking the dedicated box.
- Click on Submit.

- Your text will appear in the list of standard texts with the status "Submitted".
You need to repeat this process for each language needed. Didomi will approve the English and French versions, other translations being your responsibility.
Ask for a review of your text
1. Send an email to support@didomi.io to inform us about your text submission. Please include your account name, name of your text, and the text content in English and/or French.
2. Then, we will review your text in the shortest possible time. But please note it may take a little time sometimes, so anticipate your requests ! :)
The review may take a little time due to the legal aspect of the demand, please anticipate your requests!
⚠️ Please note that IAB and GDPR rules are different. Validation of this text concerns only the IAB aspects. For GDPR compliance, please refer to your legal department.
3. Once your standard text is reviewed, Didomi will update its status to Approved or Rejected, and send you an email to inform you.
Use your new text
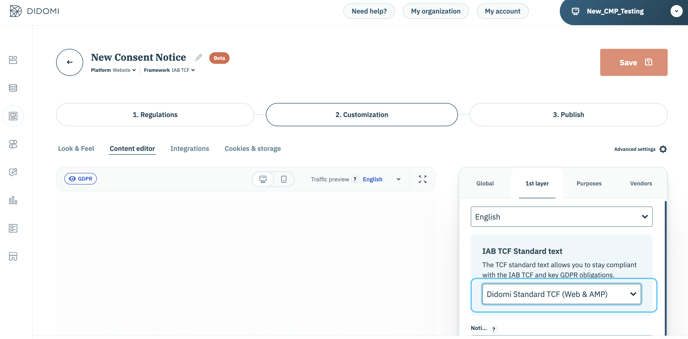
If approved, your standard text will then be available for selection when creating or modifying your notice in the Content Editor section of the step 2. Customization, specifically in the 1st layer tab.
