Here's is a quick guide to help you to create your consent notice with Didomi's brand-new console flow:
- Go to the Didomi console.
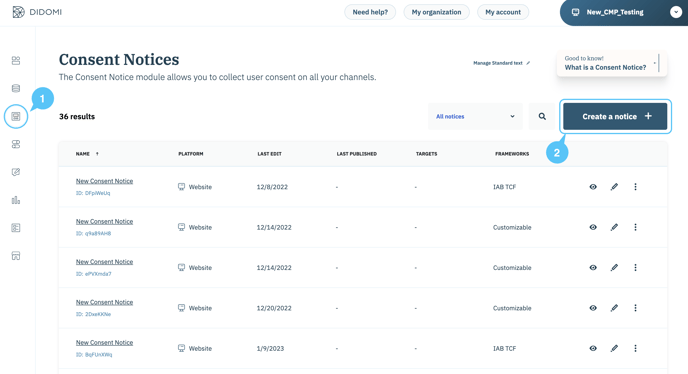
- Click on Consent Notices (1) in the left menu.
- Click on Create a notice + (2) in the top right corner.
🎉 You can now start creating your consent notice!
✅ Platforms
The first step allows you to choose the platform where you'd like to deploy your notice.
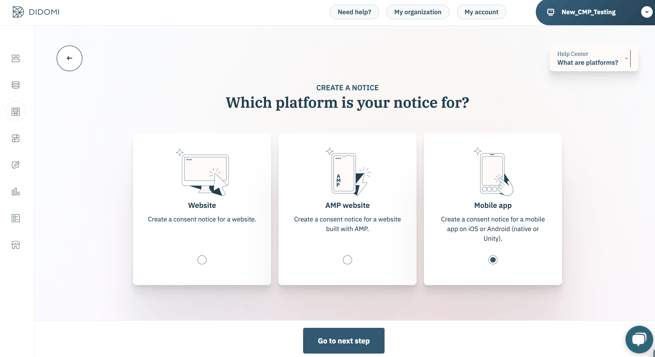
- Select Mobile app.
- Click on Go to next step.
✅ Preset
Check out the Preset section in our documentation.
✅ 1. Regulations
Check out the Regulations section in our documentation.
✅ 2. Customization
Check out the Customization section in our documentation.
The preview is not yet available for the mobile app environment.
✅ Publish
- There are two different possible cases:
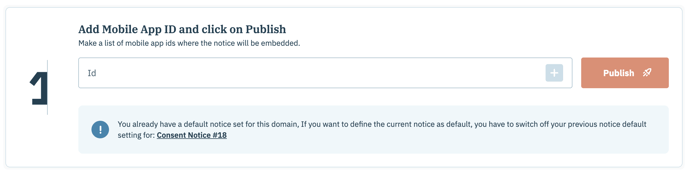
- You were using Didomi before the release of the new console flow (April 2023):
- Enter the mobile app ID of your application.
- Enter the mobile app ID of your application.
- You were using Didomi before the release of the new console flow (April 2023):
-
-
- Click on the plus sign (+) at the right to add your appId.
- You can add as many appIds as you wish.
- Click on Publish.
- You are using Didomi since after April 2023:
- You don't need to specify any domain. You just have to click on Publish your notice and continue with the tag configuration.

- You don't need to specify any domain. You just have to click on Publish your notice and continue with the tag configuration.
-
- Configure the tags on your websites to block vendors by conditioning tag loading to user consent.
-
If you use the IAB integration: for IAB vendors, you have nothing to set up if you are using the IAB integration. All you have to do is declare them in the vendors' section. The consent string allows them to retrieve the user consent status.
-
Vendors that are not part of the IAB framework have to be blocked in your app to only execute their SDK and collect user personal data after consent is collected.
📰 To block vendors on your mobile app, please refer to this documentation.
-
- Set up the Didomi SDK as explained in our documentation:
- For Android
- For iOS
- 📰 If you use Flutter for your apps, please refer to our technical documentation on how you can set up the Didomi plugin for your Flutter apps on Android or iOS devices.
- 📰 If you use React Native for your apps, please refer to our technical documentation on how you can set up the Didomi plugin for your React Native apps on Android or iOS devices.
- Click on Save.
- To ensure that your site visitors can change their consent preferences at any point in time, you will need to add a link to re-open the Didomi consent preferences pop-in in your mobile app. This link can be placed in a menu or in your privacy policy. Read our documentation to learn more.
To find a consent string on a mobile application:
- Go in NSUserDefaults for iOS.
- Go in SharedPreferences for Android.
The key name is IABTCF_TCString.
🎉 You're all set!
💡 If you have any questions, please reach out to our Support team!